10 Steps To The Perfect Push-Up
These tips will tone your arms and core to fight fatigue in the saddle.


These tips will tone your arms and core to fight fatigue in the saddle. – By Kelsey Cannon
The Perfect Push-up
It’s easy to overlook your arm muscles and focus exclusively on your legs—after all, they are the most obvious connection to your bike. However, cheating on your arm workouts could cost you power and comfort on the bike.
The push-up is a simple exercise that will get you on your way to the gun show. In fact, it looks so easy that it’s assumed that everyone knows how to do it. While most folks get the basics—lower your body to the floor by bending your elbows!—there are 10 ways you can make this exercise even better, says Sean De Wispelaere, expert trainer for a popular men’s magazine.

1. Dig your hands into the floor
The benefit: This creates torque—external rotation force—between your hands and the floor. That force naturally provides tension in your arms, shoulders, and upper back that will help you maintain a solid upper body throughout the movement.
How to do it: Grip the floor with your hands and simultaneously drive your palms down and twist them as if you were trying to rip the floor between them. Your elbows and biceps should rotate so that they face forward.
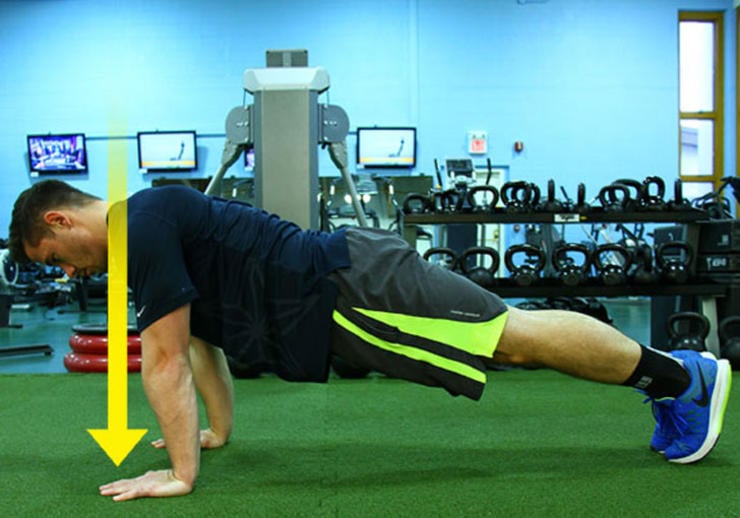
2. Keep your neck in line with your spine
The benefit: If you allow your head to reach towards the floor or tilt too far upward, you’re putting your spine at risk of injury. You’re also upping the likelihood that you bob your head back and forth, giving you the illusion that you’re performing quality reps when you aren’t. Keeping a neutral neck—so your body forms a straight line from your head to your feet—allows you maintain control over the movement.
How to do it: Don’t tuck your chin or look straight out in front of you. Instead, pick a spot on the floor that is about 15-25cm in front of your fingers and keep your eyes focused on it as you perform the movement. This should keep your neck in a straight line with the rest of your body.
To test your form: Start by assuming a push-up position, and then have a friend place a broomstick along your back. It should touch your head, upper back, and butt; this indicates that your spine is in proper alignment. If the stick doesn’t make contact at all three points, simply adjust your posture until it does. That’s the position you need to hold.

3. Squeeze a business card in your armpit
The benefit: Imagining as if you’re squeezing something super-thin—like a piece of paper—will help you activate your lat muscles to assist in the movement and to keep your upper body rock-solid.
How to do it: “Digging your hands into the floor will get you 90-percent of the way there,” explains De Wispelaere. “Achieve the remaining 10 percent by trying to squeeze your armpit as tightly as possible.”

4. Draw your shoulders back
The benefit: Having your shoulders shrugged up around your ears puts your neck and upper back in a compromised position. “Not only are they not working to keep your upper body as one rock-solid unit, but it’s also putting you at risk for injury, since movement in your shoulders when you perform the exercise will push your neck around,” he explains.
How to do it: Pull your shoulders down and away from your ears and toward your feet. Then engage your back muscles by pretending as if you’re trying to draw your shoulder blades together so they meet in the middle.
5. Pull your palms to your toes
The benefit: It’s easy to allow your torso to sag or bow, especially when you’re performing a lot of reps or you don’t have a mirror to check your form. “But this cue actually helps you contract your core—like a mini crunch—enough to keep your back flat and your torso stable,” says De Wispelaere.
How to do it: After your upper body is fully in position. Try to pull your hands towards your feet by clenching your core.
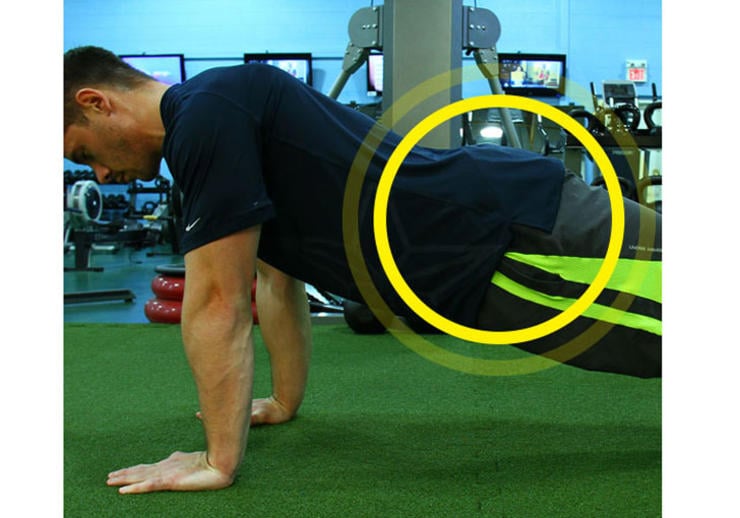
6. Clench your glutes
The benefit: Your glutes play a vital role in performing a push-up, even though it might seem only like an upper-body exercise. Squeezing them helps you lock your hips into place so your body can form one straight line from your heels to the top of your head. It will help take stress off of your lower back, reducing your risk for injury, and activate your core, making the pushup as much of an abs exercise as the plank.
How to do it: Get into a push-up position with your glutes relaxed. Feel how your lower back is being pulled towards the floor? Now squeeze your glute muscle as hard as possible to feel your hips rotate into place and remove the stress from your spine.
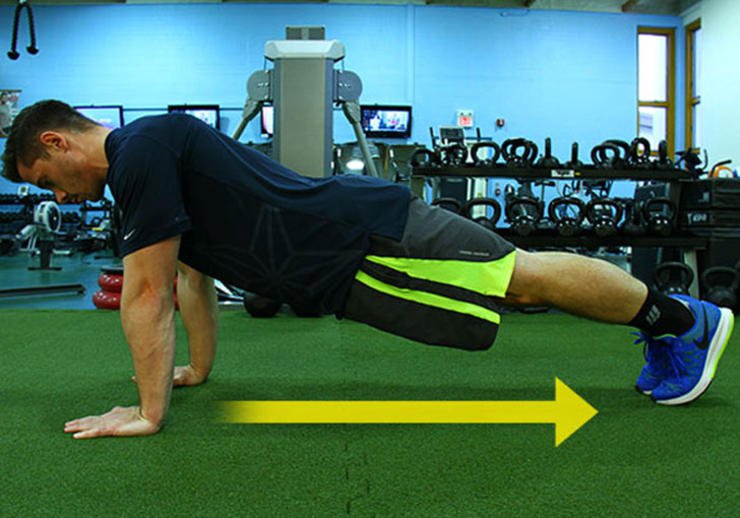
7. Pull your feet together
The benefit: Even though you’re not standing flat on your feet, you still need them to form a firm base of support. “Pulling tightly toward each other allows you to transfer energy from your lower body, through your tensed muscles, into your core and upper body, amplifying your strength from head to toe,” he says.
How to do it: Make sure your feet are touching. Then press them together by pretending like you’re trying to crack a nut between your ankles, trying to draw your ankles as close as possible to each other. You should feel the muscles in your legs activate and tense.
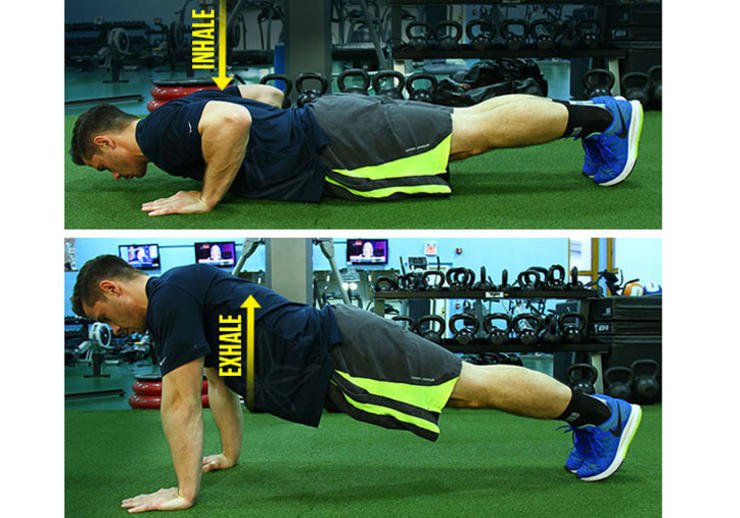
8. Inhale down, exhale up
The benefit: You can use your breath to help you push yourself further and harder. Try it right now: Exhale all of the air from your lungs. Feel how your core muscles contracted to help you force out the last bit? Like blocking your feet together, that tension in your core can help you amplify your stability and pushing power for better, stronger reps.
How to do it: As you lower towards the ground, take a deep breath in. As you push up, quickly exhale as much air as possible. Repeat with every repetition during slow and controlled sets.
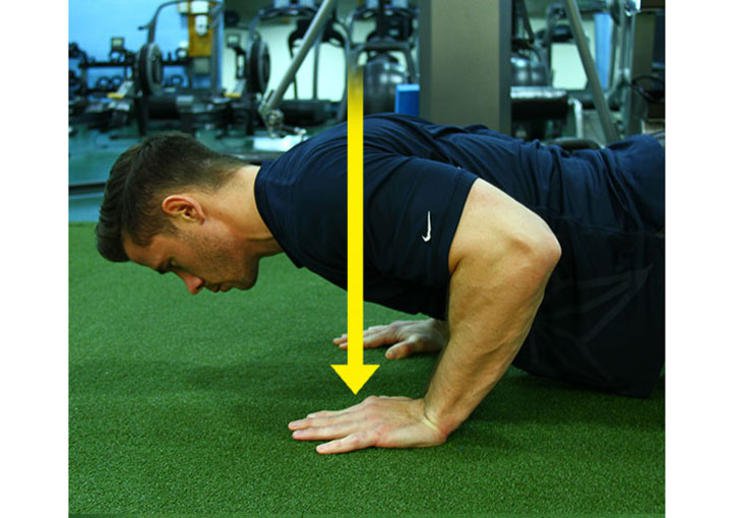
9. Pull your chest to the floor
The benefit: Thinking about leading with your chest allows you to avoid both head bobbing and sagging hips. Pulling your chest towards the floor prevents you from just using gravity to lower you to the ground—therefore performing only half of the work.
How it works: Get into a solid push-up position. As you lower, focus on using your lats and upper back to control your downward movement to pretend as if you’re pulling yourself towards the floor.
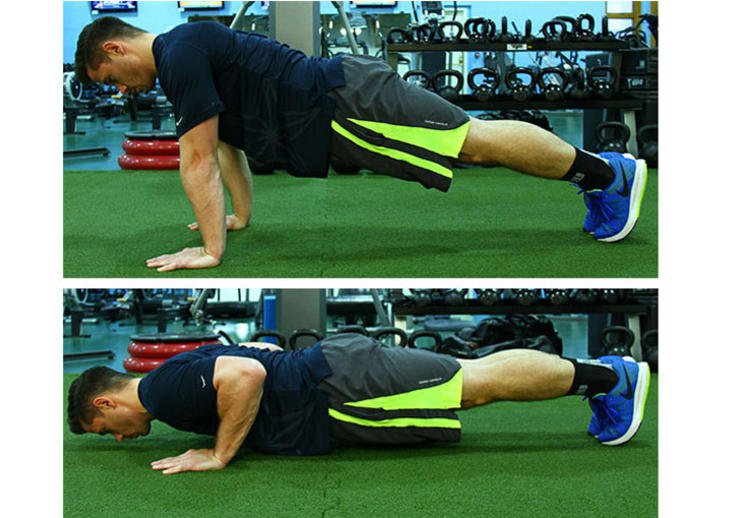
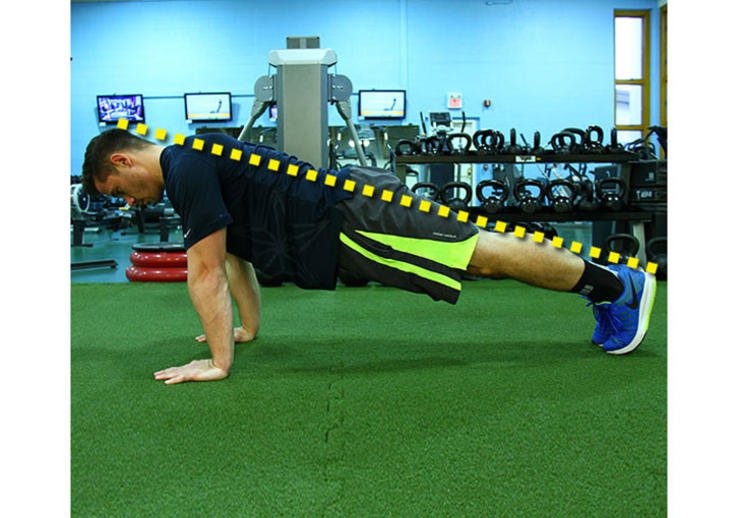
10. Lift the body as one solid unit
The benefit: When you get tired, it’s easy to slip into bad form by arching or rounding your back. All of the cues that matter at the top of the push-up, also matter at the bottom. Prevent your form from faltering by pushing your body away from the floor if it’s a board. It will help you to keep the muscles from your head to your toes engaged as one rock-solid unit.
How it works: Do not let any muscles relax at the bottom of your push-up. Keep everything tight and imagine yourself as a solid tabletop hinging at the feet upwards from the floor.
*Photographs by Kelsey Cannon.
READ MORE ON: indoor strength training programmes workouts