
Riding your bike on gravel roads and trails brings many riders peace, tranquility, and views that often go unseen. But one of the unique challenges when riding gravel roads is there is less of everything—fewer petrol stations and spaza shops, less people to help (although the ones you do encounter will bend over backwards to – rural South Africans are wonderful!), or even a familiar road to get you back home. And that’s just on the exploring side – gravel-themed events are exploding, all over the country, with a bent towards the extreme with 100- and 200-miler distances attracting all the cool kids, but almost all with much more manageable route options, too, that make you part of the most welcoming branch of cycling.
Recently, I attended a three-day gravel riding festival and chatted with many cyclists about their tips for new riders—plus, I added some suggestions from my experience riding gravel for many years.
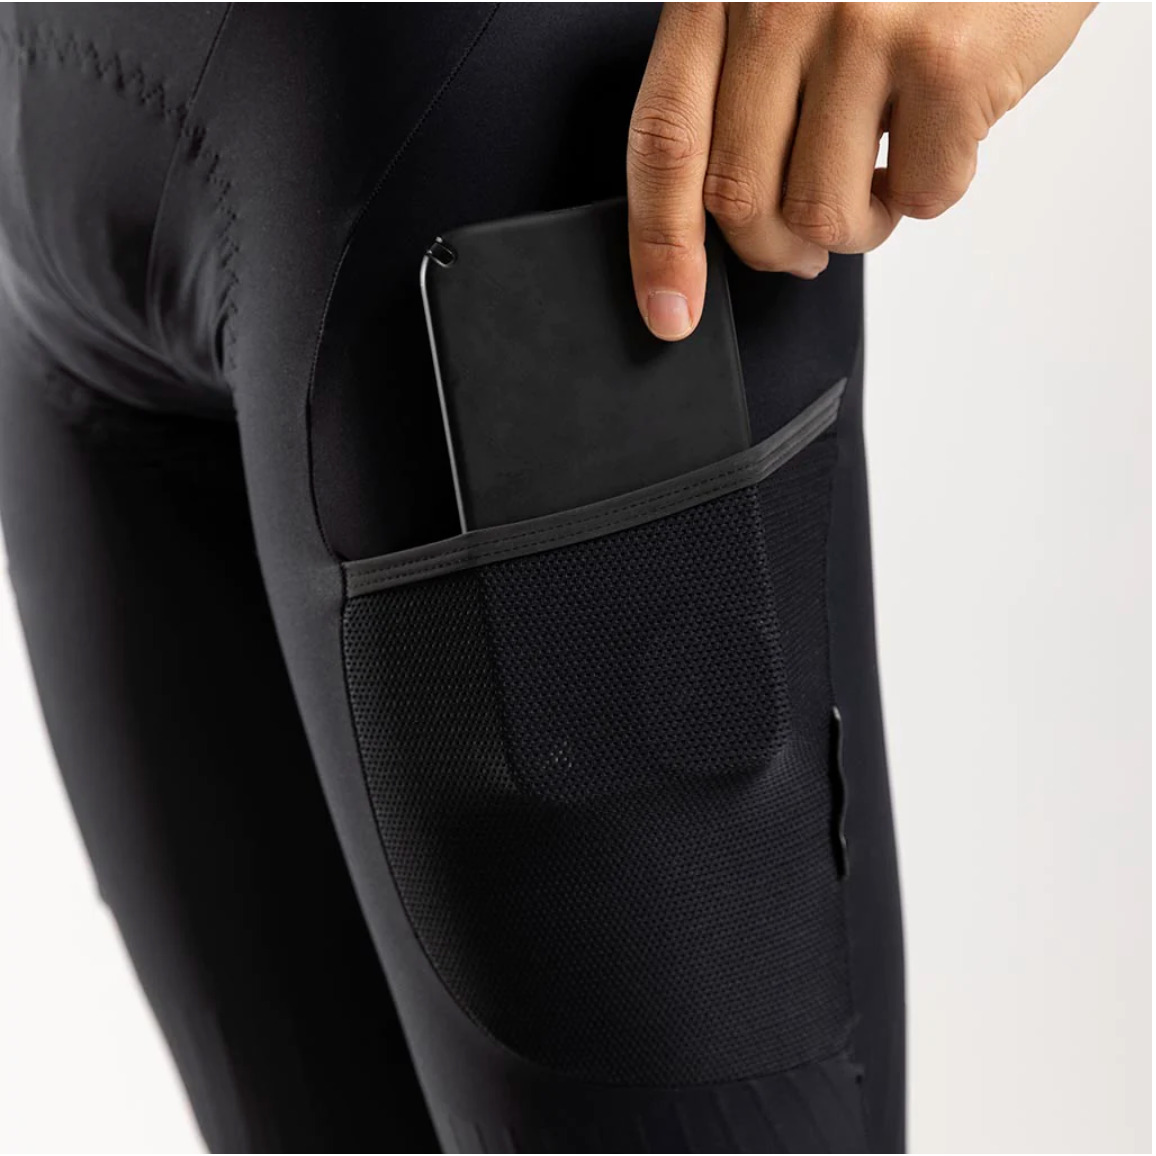
What to Wear on Gravel
While getting new riding clothes is great, the price of dedicated gravel bibs and jerseys can be a bit steep for many riders. I always advocate for using the right equipment, but a simple pair of inexpensive cycling shorts or padded liners helps improve comfort for rides longer than just a few miles long. Use what you already have – you can buy into the hype later if the bug really bites. Pair these with your favourite activewear shirt for a lower-cost cycling kit, and carry your stuff in an inexpensive bar bag, like this one from Ciovita. The right thing to do, though, if gravel is something you want to spend some time doing in the future, is to look at a cargo-pant style offering like the Ciovita Apex Cargo bibs or Assos’ Kiespanzer – both require some investment, but are money well spent in long term comfort, durability and sensible carrying options for the extra food and things you might need on longer rides.
Also, I highly recommend gloves. They provide extra grip on the bar and protection for your palms. And don’t forget a helmet and sunglasses; both go a long way to protect your brain and eyes.
Snack on ALL the snacks!
Riding burns calories, but you must stay on top of it as you ride, or else the dreaded bonk can happen. Since gravel riding often takes place far away from populated towns or cities, you might find a convenience store mid-ride to fuel up. So, carry your snacks and hydration with you for your ride.
Mallory Creveling, Bicycling’s Deputy Editor for Health and Fitness, typically recommends 30 to 60 grams of carbs per hour of riding. What your gut can sustain or intake is worth heavy consideration. Every rider’s metabolic system processes food and hydration differently.
Pay particular attention to how you feel and what you eat on the bike—it makes riding more enjoyable. Fruit bars and bananas are some low-cost and easy-to-find ride snacks. Over the decade of becoming a Ride Snack Connoisseur, my favourite quick snacks found at most stores are any Clif Bar flavor (I’m not picky), banana or apple sauce, and definitely some type of candy (apologies to my dentist). Snacking should be fun and not a chore!
Navigation
Many free mobile apps will help get you where you need to go and record your adventure.
RidewithGPS and Strava have free features that allow you to plan routes, see trails and points of interest, and track your riding metrics and progress. Otherwise, using your phone’s native navigation features or Google Maps will do the trick for short rides. For longer-distance rides, consider purchasing a dedicated GPS device.
The Hammerhead Karoo 2 and Garmin Edge series computers are both solid offerings.

Tyres
Whether it is your first or your hundredth gravel ride, finding a tyre that works well for you can be challenging. No one tire works flawlessly in every gravel riding situation.
If you ride exclusively on tar or super smooth dirt roads, slick tyres are a great option. For riding on trails and very rocky gravel roads, consider picking a knobby tyre. Otherwise, choose a mixed-conditions tyre. Often equipped on new gravel bikes, mixed tyres balance the needs for pavement and gravel riding.


Fixing Flat Tyres
When you get a flat tyre, being prepared is half the battle. An unfortunate reality of riding gravel is that, at some point, you will get a puncture. Since gravel rides often happen in the back of beyond, or out of cell phone reception, you can’t phone a friend or order an Uber or Lyft to come to pick you up. The first step, in African conditions, is to run tubeless and know how to fit it, top up the sealant and fix it when you do run out of air – get your bike shop to help you demo a tubeless plug kit, even if it costs a little, you want to learn there, not between Putsonderwater and Nowherenice.
Whether you use tubeless or tubed tyres, getting your tyre to hold air after going flat is critical to getting you home. If you do not know how to install a tube, ask your local shop or a more experienced riding friend for a demonstration. The basic tools you’ll want to carry for gravel rides include tire levers, the correct size tube, tube patches, and a pump (or a CO2 inflator and cartridges). Also, carry a mini tool with the wrenches needed to remove your wheel.Pedals & Shoes
Pedals and Shoes
Most new bikes do not come with pedals. There are two main options gravel riders use: clipless (sometimes called “clips” or “clip-in”) or flat (sometimes called platform) pedals.
Clipless pedals mechanically attach with a cleat affixed to cycling-specific shoes. These are the go-to for most racers and long-distance riders. But they are not the only choice. You can also use more traditional flat pedals.
If you have previous experience riding with clipless pedals, you can usually use your mountain bike-style clipless pedals and shoes for gravel riding. Mountain- or gravel-style shoes allow for brief walks off the bike, and dual-sided pedals are easier to clip into than single-sided road pedals.
If you are trying to stay comfortable on the bike, flat pedals and bike-specific shoes work perfectly fine and are the choice for many riders. Many riders feel flat pedals allow their feet to move more naturally over the pedal body. They also allow riders to quickly put a foot down without needing to unclip. Flat pedals don’t eliminate the risk of crashing, but they reduce many riders’ fears of falling over while clipped into the bike.
Conclusion
Whether riding a 25km loop or a 200-mile multi-day adventure, the ride starts with the considerations you make for yourself and your bike. Every rider discovers personal tips and tricks to make their rides more enjoyable as they ride more.
What are some necessities you bring on your rides or tips you have learned? Hit us up HERE with your advice.