3 Nerve-Flossing Exercises to Ease Hand Numbness on the Bike
Here are two super-simple exercises that might just sort out numbness, pain and tingling in your hands on long rides.
Few things can spoil a good ride faster than numbness in your “contact points”—the bits of your body that come into contact with your bike (hands, feet, and nether regions). While problems with any contact point can jeopardise your ride, hand issues like weakness, tingling, and numbness can also be dangerous. Hands, after all, operate the brakes.
“Hand numbness is pretty common with cyclists, especially if they tend to ride with their hands in the same position for extended periods of time,” says Glenn Kasin, DC, a chiropractic physician at Wellness in Motion. “It results from the excessive compression, irritation, or stress on the nerves.”
What causes hand numbness or tingling?
Three nerves in particular—the radial, ulnar, and median nerves—are involved in most hand numbness or tingling that occurs while riding. When any one of these nerves gets irritated or compressed, symptoms can range from the mild discomfort of pins and needles all the way to portions of one or both hands going completely numb. You can tell which nerve is unhappy by tuning in to which part of the hand is experiencing symptoms.
“The radial nerve has sensory innervation to the back of the hand, covering the thumb and the first two fingers,” says Nick Weigel, DPT, Boston-based physical therapist and Cat 2 cyclocross racer. “We’d typically expect to find the thumb and perhaps the first two fingers numb on the back of the hand. Typically the palm will not be numb as that is innervated by the median and ulnar nerves.”
“The median nerve which goes through the carpal tunnel is another culprit when compressed or irritated and can result in numbness in the thumb, index, and middle finger, and half of the ring finger,” says Kasin, an avid cyclist and former staff member of the RadioShack cycling team during the 2010-2012 Tours de France. “The ulnar nerve, which runs down the medial side of the arm, elbow, and all the way to the pinky, tends to be more the common problem child, resulting in the dreaded numb pinky that many cyclists are all too familiar with.”
How do you address hand numbness?
Evaluating a rider’s fit on the bike is always the first place to start when it comes to contact point issues. Sometimes a proper bike fit by a trained bike fitter is all it takes to resolve issues like pain or pins and needles.
When it comes to hand issues specifically, riding technique, lack of core strength, and muscle fatigue, or even the right pair of gloves are additional factors to consider.
“The most common causes for [hand numbness] happening is usually two fold; 1. improper bike fit and 2. riding in the same position for extended periods of time,” Kasin explains. “By altering hand positions on the handlebar—riding [with hands] on the tops of the bars, the brake hoods, or the drops—the rider can both change up the muscle groups that are being used to stabilise the rider, but also to give the nerves of the hands a little break from being compressed and irritated resulting in the annoying numbness riders will tend to feel.”
“One other easy fix while on the bike [could be] to wear cycling gloves to help alleviate the issue, as most cycling gloves have some small pads, which provide a little buffer and shock absorption between the nerves and the handlebars to keep from stressing the nerves too much,” he says. “They also come in handy should you ever find yourself in a crash and keep from getting road rash on your hands.”
What if the hand discomfort just doesn’t go away?
Now, what if you’ve had your bike fit dialled by a professional bike fitter, you change your hand position frequently while riding, you regularly do core strengthening exercises, you’ve tried ten different pairs of gloves and you’re somehow still having issues? Well, it’s time to look past the bike and more closely at the body itself, specifically the nerves.
“You can modify the bike all you want, but if you’re dealing with a real medical issue, like nerve entrapment, it needs to be dealt with to get at the root of the problem,” says Weigel.
In the case of nerve irritation, compression or entrapment, a technique called nerve flossing can be extremely helpful in alleviating aches and discomfort. The technique, sometimes also called neural gliding or neurodynamic mobilisation, is easy to try, requires no equipment, can be done anywhere. And best yet: It can provide fast relief. You can also do nerve flossing on its own or in conjunction with other therapeutic exercises.
What is nerve flossing?
“Nerve flossing, also known as neural gliding, is a gentle technique that helps to stretch and mobilise irritated, tight or compressed nerves. By ‘flossing’ the nerve, we are trying to help stretch or glide the nerve through irritated or compressed structures to promote increased range of motion and decrease the numbness or tingling that the cyclist is dealing with,” explains Kasin.
“It is a helpful component as it will help to alleviate any adhesions from developing and keep the nerves smoothly flowing between the tissues. The immediate benefits of the nerve flossing should be a pretty immediate reduction of symptoms in the short term. Results can be seen within a few minutes to as long as two weeks,” Kasin adds.
As with any therapeutic technique, there’s no one size fits all since every rider’s body is unique, and neural flossing is no exception. “I find that flossing can be intense for many patients,“ says Weigel. “Ultimately it comes down to patient response. Flossing is easy to try and the only downside is that it may be a bit aggravating to some.”
How to incorporate nerve flossing into your routine
Ready to give nerve flossing a shot? It’s important to start gently and see how your body responds. Ultimately, “nerve glides can be performed three to four times per day with slow, smooth movements (roughly five seconds per rep/cycle) of 10 repetitions at a time,“ says Kasin.
To get you started with your own practice, these nerve flossing exercises for hand numbness can help keep the radial, median, and ulnar nerves happy and your hands symptom-free.
Stand with feet hip-width apart. Lift one arm up to shoulder height, keeping it straight, with palm facing up. Slowly extend the wrist until the fingers are pointing straight down. Gently tilt the head towards the extended arm, making sure not to let the shoulder come up towards the ear. Then slowly flex the wrist until the fingers are pointing straight up while simultaneously dropping the head to the opposite shoulder, keeping the arm straight and the shoulder relaxed. Then, return to the starting position. This is one rep. Repeat for up to 10 slow and gentle reps.
Radial Nerve Glide
Stand with feet hip-width apart. Shoulders relaxed, arms down by sides. Lift one arm about 20 degrees while keeping it straight and turning the palm to face behind you. The thumb should be facing the body. Flex the wrist and gently raise the arm up to 45 degrees before lowering back down to 20 degrees, keeping the shoulder relaxed and the wrist flexed the entire time. This is one rep. Repeat for up to 10 slow and gentle reps.
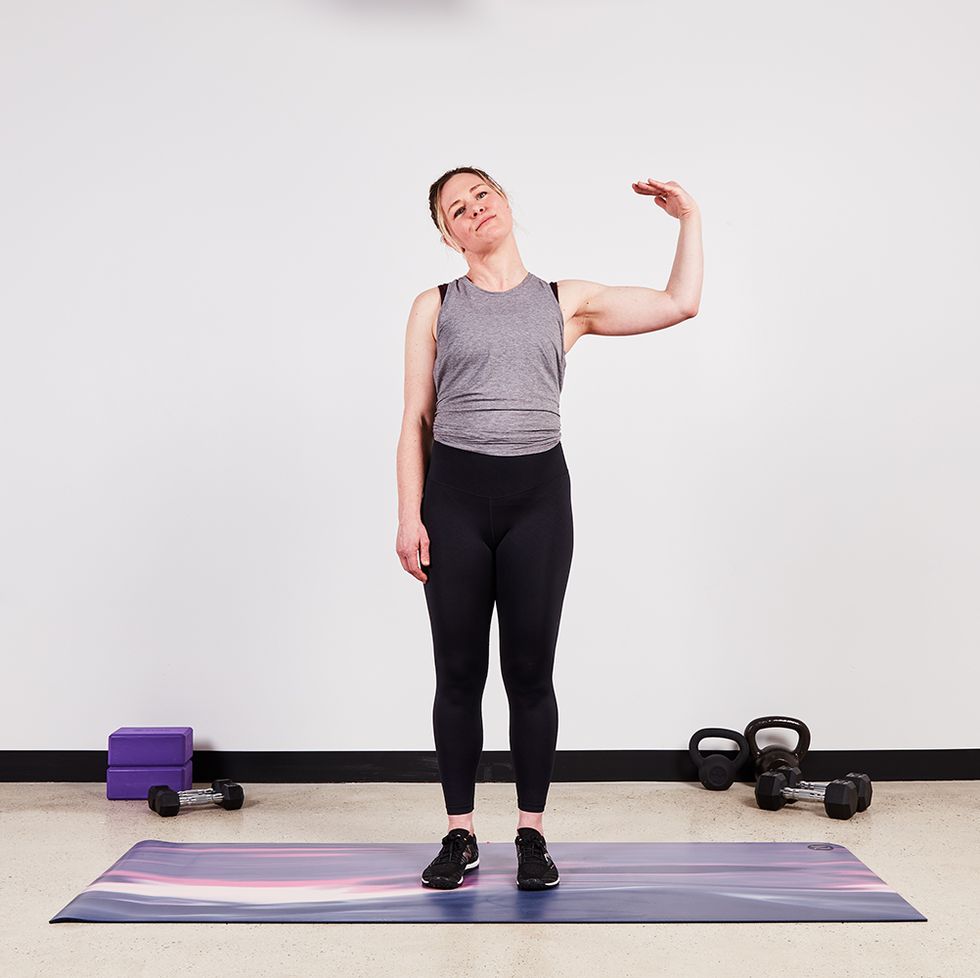
Ulnar Nerve Glide
Stand with feet hip-width apart. Lift one arm up to shoulder height, then bend elbow 90 degrees with the palm facing the head. In a slow, smooth motion, tilt the head towards the opposite shoulder while simultaneously flexing the wrist so the fingers are pointing toward the head. Then slowly tilt the head towards the raised arm while extending the wrist at the same time until the fingers are pointing away from the head. Keep the shoulder relaxed and the arm bent to 90 degrees the entire time. Repeat for up to 10 slow and gentle reps.
READ MORE ON: exercises flossing hand numbness hand pain injury prevention numbness