You Can Ace The Ups – and Downs – of the Cape Town Cycle Tour
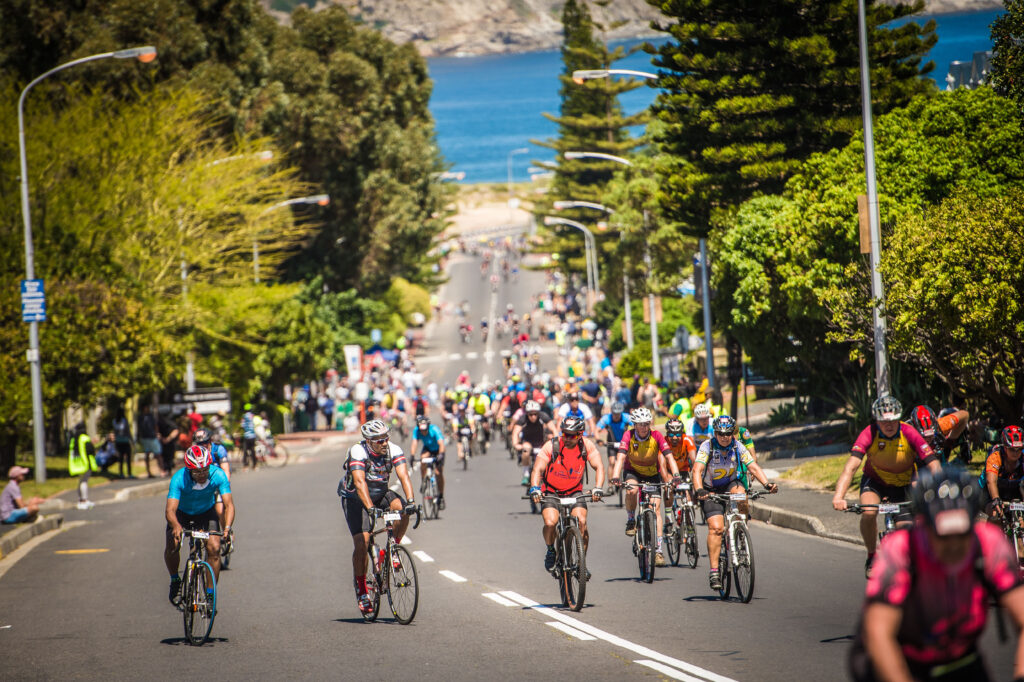
On paper, the Cape Town Cycle Tour route is a doddle - but add 20-plus-thousand equally keen cyclists to the mix, and it can be stressful.
The Cape Town Cycle Tour route has a number of storied climbs – and equally infamous descents – that can make or break your goal time. Ace both acts against gravity, and your finish-line Coke will be that much sweeter.
Nelson Mandela Boulevard kicks it all off; and because you haven’t had time to warm up, this one always hurts.
The best strategy is to scramble to the front of your group for the narrowing up onto the freeway, so that you can manage the short savageness of it at your own pace. Then settle into the group, and let the keen beans take the wind – the middle section is properly fast, so shelter is important, as the wind will be strong already. If you can, kick again just before the top, so you can descend at the front.
Of course, every single other rider has this plan too; but the left-hand side of the road is normally open, as the riders hide against the armco out of the wind. The matches you burn moving up are worth it, for the safety of descending relatively calmly.
Hospital Bend is the first and most feared descent on the day. In theory it’s a straightforward downhill; it’s complicated a little by speed, but much more by over-eager and already tired humans doing silly things.
Steer clear by being at the front, if you can, even if it means going harder than you hoped to, so early. It will be worth it to kick hard over the top and then have the full road to work with. But you don’t need much in the way of descending skills here; let go of the brakes, hold a controlled line, and enjoy the rest.
UCT has two tough small rises that never get full credit for how cruel they are.
Bunch dynamics play a big role here. The first riders roll over at a steady pace, but the riders at the back first have to slam on anchors to avoid the peloton after Hospital Bend, and then have to sprint up to speed again. Many a sub-whatever has been blown right here.
Another reason to overdo it a little on Nelson Mandela Boulevard. Because from here on, there’s plenty of time to recuperate.
Paradise Motors is the next descent, and a nasty one at that.
The bunch tends to be huge again, with dropped riders getting back on after UCT’s horror show, and every man and his cog wants to hit Edinburgh Drive at the front. In the faster groups, this is often where they hit the highest speed in the whole tour; plus it narrows at the bottom, with creases in the road begging for narrow wheels.
There are surprisingly few crashes, thankfully – mainly because the road is fairly straight. The right-hander at the bottom can be taken full-chat.
Edinburgh Drive: Most CTCT veterans collect tales of woe about Suikerbossie, yet this climb matches it on distance and gradient – it just comes when you’re on fresher legs.
It’s made up of two parts. The first section isn’t that steep, and will require you to either make sure you hold your position in the group, or keep moving up to start the second part – the steep mother, from the lights to the lights – as far forward as possible. This way you can ride at your own pace and slowly filter back through the group, hopefully to still be in the tail of it by the crest. You need to give it full welly here!
We said it’s in two parts; but the sting in Edinburgh Drive’s tail is actually the hardest part. After the lights, the crowd dies down – but the gradient doesn’t. Concentrate on keeping on the wheel in front of you; it’s easy to slip up, and even a tiny gap onto the Blue Route will be virtually impossible to close. Burn those matches – 20 seconds here can cost you minutes.
Wynberg Hill is fast, wide and virtually dead straight. The temptation is always to try and make up lost time on your own here, and down onto the Blue Route; but you’ll be better off sitting up, eating and drinking while you wait for the next sizeable group to catch you.
Let them do the chasing. If you do get back to your bunch, you might even be rested enough to not get dropped again. If you don’t, make the most of your new group, which is probably your standard on the day anyway.
There’s little to worry about in the next 30km, besides how narrow Main Road is; but even Main Road is fairly calm.
Smitswinkel is the next major obstacle; again a multi-part ascent, and again a crunch point where a handful of seconds lost can turn into minutes by the finish.
The first kicker is fairly steep, up from Miller’s Point, and offers another opportunity to stand and attack the slope before settling in for a few kilometres of seated cardiovascular hell on the rolling foothills. You’ll hate the south-easter here; but the moment you swing right for the final kay of the climb, you’ll love it.
Dig deep here, and make sure you’re going over the top with the biggest bunch possible, because you’re going to spend the next 15km with it – it’s super-difficult (and dangerous) to make back time on this fast, bumpy section.
Ocean View is our next bump, and what a shock it is to tired legs. Make sure you’ve used the relatively calm stretch from Smits to eat and drink as much as you can; that’s your fuel for the last two climbs of the day, but also for this little surprise.
It rears up for just a few hundred metres, but comes after a long, high-speed section that flows into an interminable drag before demanding raw power from your legs for the first time in half an hour. Attack it, and get it over and done with; there’s plenty of recovery time before Chappies.
Little Chappies is another hard little number, after a long period of speedy riding (and eating, hopefully). It’s short enough to hit hard, if you’re feeling good; but remember there’s a tricky descent to navigate, and then the main climb, so take it a little easier if you have to.
The descent is characterised by the most exquisite views – and a tight right-left-right combination of corners that should take priority over sightseeing. These are the first bends, really, for which you will need to consult our handy list of tips – with a small warning that if there’s a northerly wind, it gets properly gusty here; so take it easy.
Main Chappies terrifies many, but shouldn’t. The build-up after little Chappies is a nasty drag, nothing more. But once you get to the actual climb, exiting the tunnels, you only have a smidgen of a kay left to climb, and only 70m to gain. The road will be closed, so use all of it to straighten out all the corners and make it even shorter.
Warning: when you think you’re at the top… you aren’t. We’ve all been fooled by that little false nek when there’s still a few hundred metres to go. You’ve only made it if you can taste the Coke.
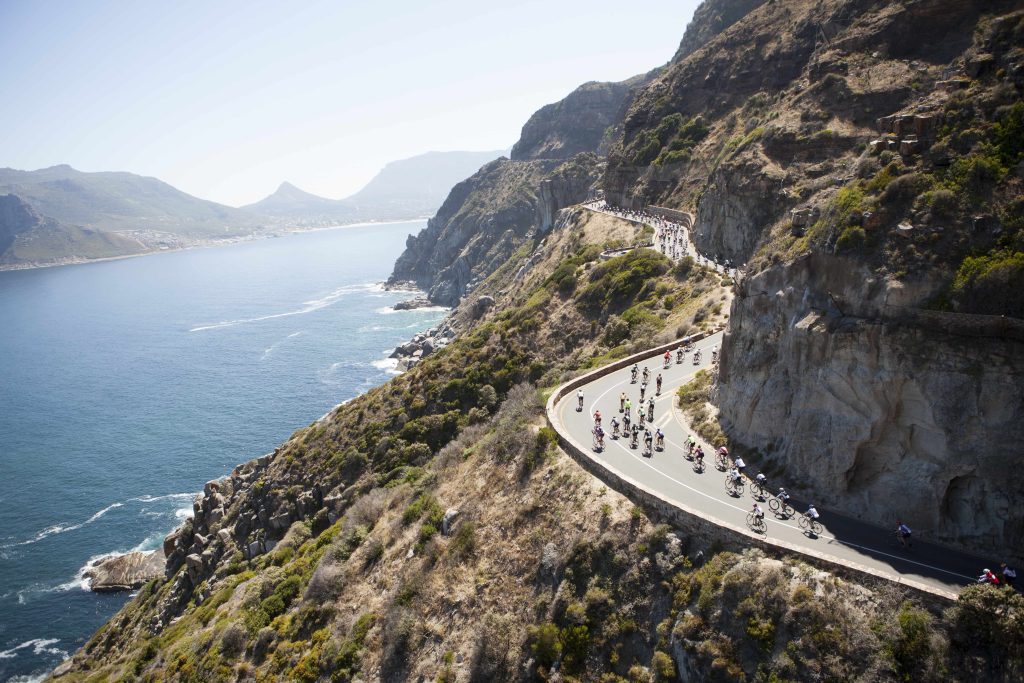
Chappies Descent is arguably the most thrilling section of the route, a series of fast straights and wonderful turns that will ask everything of your downhilling skills. Just be careful of crosswinds, if the south-easter’s pumping – watch the riders 100m ahead for early warnings.
The only tricky section is the right-hander on the concrete at the old fort; and the ensuing drop into Hout Bay itself, which is fast and has a blind right-hander to finish that requires respect. Even with closed roads.
Suikerbossie: Much feared – not really because of its severity, but because of where it lies on the day; you’ll be feeling the 90km in your legs by now.
But that will have to wait. First you have to head up through Hout Bay’s ‘CBD’ (a “miserable @&%#”, it was once called by Tour de France winner Stephen Roche), before a fast roll into hell. On any other day, Suikerbossie isn’t actually that bad; the gradient doesn’t vary, beyond easing up gradually around the halfway mark. So the final 600m from the traffic lights gets gradually faster and faster, if you can banish the past few hours from your fragile mind.
Look ahead, and make the top your virtual finish line; because from there, it seriously is almost all downhill. You have nothing to hold back energy for – just go.
Grand Finale: I know we said Suikerbossie was the virtual end, but you still have 15km to go, with just two irritating bumps – before and after Camps Bay – to ‘sprint’ over. The descent from Llandudno is fast, and wide with closed roads, but can be fairly frightening if the south-easter is blowing. Tuck all the way to the right, and find shelter in the lee of the mountain.
Follow a trusted wheel, and concentrate on keeping your pace high all the way through to Clifton, where the final tricky bit of the day comes.
The St John’s Road descent, down to the promenade, will punish you for silliness; so take it easy, hold your position in your group, and gird your loins for the final few kilometres of mayhem before the finish.
READ MORE ON: ace the route Cape Town Cycle Tour CTCT ctct route