Eight Ways to Silence Noisy Disc Brakes for Good
The loudest cries from disc brake detractors revolve around the sounds they can make when not perfectly aligned or maintained.
Road disc brakes offer reliable and confidence-inspiring braking power, even in wet conditions. And this is why once most riders switch to discs, they never return to rims brakes.
But as reliable as disc brakes are, they can make a lot of noise if they not correctly set up or maintained. Whether it is a ‘pinging’ with every rotation of the wheel or a howling screech during braking, the cacophony of disc brake noise can be enough to ruin a group ride or break you out of your zone when out by yourself.
Occasional disc brake noise is normal and not cause for concern. Some noise is expected if you ride through a puddle or get caught in the rain. Most of the time, the brakes quiet down on their own. But if your brakes still make noise after a few dry rides, you might have some contaminated pads or rotors on your hands.
Another normal disc brake noise is pinging sounds after a long steep descent. The exact cause of this pinging might vary depending on which disc brake manufacturer you ask the question. Dylan Stucki, a PR representative for Shimano, told me the pinging is caused by temporary heat deformation of the rotors. SRAM’s Technical Marketing Manager, Brooklyn Fowler, basically said the same. They stated that it was caused by “a temporary heat distortion of the rotor which goes away as the rotor cools back down.”
When disc brakes are correctly set up, any noise should be minor and temporary. After a few moments on flatter ground, the system will cool off and go silent again. However, if this happens almost every time you use the brakes, or if the noise sticks around for minutes and not seconds, it’s a sign that your brakes need attention.
Assuming your disc brakes are making noise outside of the normal range of pings and tings, these are some steps to diagnose and fix your noisy disc brakes.
Knowing Your Type
To start, you need to identify the type of disc brake system you have on your bike. There are three basic types.
Hydraulic
Fully hydraulic system, most commonly found on mid to high-end bikes. This system uses a hydraulic hose all the way from the brake lever to the calliper. If you are used to cable-pull brakes, this can be the most intimidating system to work on. But don’t stress! There are steps you can take to quite a noisy set of hydraulic brakes that do not involve messing with hydraulic fluid.

Cable-Actuated
These brakes (also known as mechanical disc brakes) are often found on budget-friendly bikes, though some boutique cable-actuated disc brakes are out there. Cable-actuated disc brakes can be a lot cheaper than hydraulic systems. Many riders find the familiar cable pull format easier to work on. Instead of a hydraulic line running from the lever to the brake, these systems rely on standard brake cables and housing.
Cable-Hydraulic
Finally, there are hybrid mechanical/hydraulic disc brake callipers. Most commonly purchased as an upgrade to bikes with mechanical disc brakes, these hybrid-type brakes are sometimes found on new bikes. This system uses the same brake levers and cable-pull actuation as a mechanical disc brake. But rather than pulling an arm on the calliper that mechanically pushes the brake pads against the disc, a hybrid system activates a hydraulic piston in the brake calliper to move them.
All three of these systems will occasionally get noisy, and most of the steps to remedy this are the same.
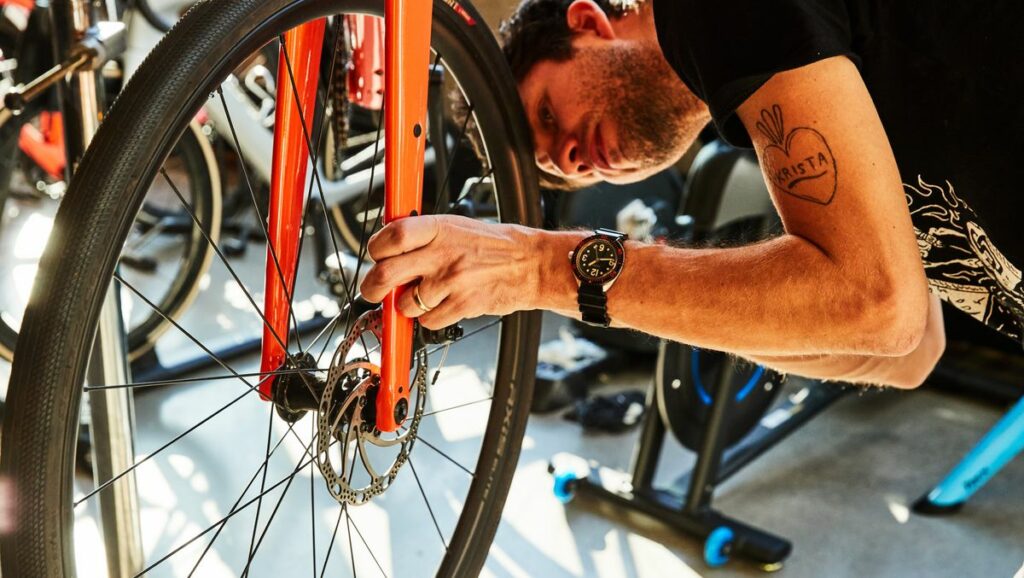
Tighten Your Disc Rotors and Brake Callipers
If your disc rotor or brake calliper is not tightened to the specified torque spec, you might hear a metallic tinging noise. Improperly tightened bolts also prevent you from achieving proper rotor and calliper alignment, as any free play of these components will be outside the tolerance limits.
Centerlock-style rotors use a single lockring to secure them to the wheel’s hub. These rotors typically require 40Nm of torque. There are two types of lockrings, external and internal. Both work the same and can, more often than not, be interchanged.
External lockrings, generally, are found on mountain bikes and use a bottom bracket tool to tighten or remove them from the hub. Internal lockrings are more common on road bikes. Their lower profile allows them to be used on frames and forks with tight clearances (like road bikes). Internal lockrings use the same tool and interface as Shimano and SRAM cassette lockring tools for tightening or removal.
 If your bike uses six-bolt disc rotors, you should tighten the bolts gradually in a star-shaped pattern. Start by tightening one bolt and then move to the one directly opposite. Then tighten the bolt directly next to the first bolt you tightened, then opposite that bolt, and so on, until all six bolts are evenly tightened. Always use all six rotor bolts. The rotors are designed using all six for support. Don’t use 3. Don’t use 4. Use all 6. It is not worth getting hurt to shave the minute number of grams. And always tighten the bolts to the listed torque spec.

Poor Calliper Alignment and How to Fix It
A common reason for disc brake noise is the rotor rubbing against the brake calliper due to the two not being properly aligned. If you look inside your brake calliper, it’s often easy to see if the rotor is centred between the pads. If the rotor is so far out of alignment that it constantly contacts one of the pads, this will cause noise and brake rub.
If the rotor and calliper are just slightly out of alignment, you might experience increased noise from issues like heat deformation under braking and sometimes frame flex. Because the tolerances on road disc brake systems are so tight, having proper alignment is crucial.
Notes on Mechanical Disc Brake Set-up
If your bike uses mechanical disc brakes, it’s important to check if your brakes actuate from both sides or if they only push a single pad. The easiest way to check this is to look inside your brake calliper (the same way you would check for rotor alignment) and squeeze the brake. If both pads move in on the rotor simultaneously, you should aim to centre the rotor.
If only one of the pads moves (on mechanical systems), then your rotor alignment procedure will be slightly different. Try to position the calliper so that the stationary brake pad is as close to the rotor as possible without rubbing or making noise. This allows both brake pads to make full, even contact with the rotor when you pull the brakes.
Check those QRs
If your bike has quick-release dropouts, ensure the wheel sits straight in the frame and fork. The best way to do this is to tighten the wheel while the bike is on the floor. This allows gravity to centre the wheel in the dropouts. If your bike has thru-axles, you can skip this step as a thru-axle system centres the wheel as it’s being tightened.
Centre the Calliper
 First, slightly loosen the two calliper-fixing bolts that hold the brake calliper to your frame or fork. You don’t need to undo them entirely, just enough that the calliper has a bit of free float.
Next, give the wheel a spin and pull gently on the appropriate brake lever until the wheel comes to a stop. Without releasing the brake lever, retighten the two calliper mounting bolts. Step back, give the wheel a spin, and check your work. If things are still not quite centered, you might need to loosen the calliper and repeat these steps again.
 This process allows the calliper to realign itself with the rotor. Most of the time, this simple procedure will solve disc brake noise. I also do it every time I swap between wheelsets, even if the rotors aren’t rubbing. Once you’ve practiced doing this, the process only adds a minute or two to a wheel swap. It’s worth the time ensuring your callipers are correctly aligned. This helps ensure even brake pad wear, which prolongs the life of your pads and rotors.
It Might Be a Bent Rotor
If you aligned your calliper and still have brake rub, a bent rotor may be the issue. This commonly happens from leaning your bike against something and not realizing your rotor is also making contact with it. Putting your bike in your car is another easy way your rotors can get bent. Despite those little metal discs being made from steel, they are not designed to take any uneven sideways force.
To fix a bent rotor, you’ll need to carefully and patiently find the spot where it’s bent. The easiest way to do this is to slowly spin the rotor in the brake calliper and listen for when it makes a noise. Look inside the calliper to see against which pad the rotor is rubbing. Then, rotate the wheel back so the bent part of the rotor is out of the calliper. Next, use a rotor truing tool to bend it away from the side of the calliper it was touching. Be careful not to apply too much force, as it’s easy to bend the rotor too far in the other direction.
If your rotor is bent in multiple places, you probably will not get it perfectly straight again. By all means, you can give it a try but also don’t wait to order a replacement.
Contaminated Pads or Rotors (and What to do About It)
If your brakes are noisy every time you use them, and you’ve also noticed a decline in braking power, there is a good chance your pads are contaminated. This can happen from getting some degreaser or lubricant on your pads. It can even happen by riding through a bit of oil on the road or having your bike on a car rack.
It is essential to take care when applying either lubricant or degreaser to your drivetrain. Avoid spray-on lubricants and degreasers. It’s easy to accidentally overspray the drivetrain with degreaser—contaminating your pads and rotors—that are just a few inches away.
I recommend using a brush (I dedicated one to degreaser duty) for cleaning. This lets you carefully apply degreaser to the chain, gears, and chainrings. Then, rinse away the degreaser and chain grime. Dry your chain, and then use a high-quality lube to make sure things are running smoothly. I’ve written many words on the best chain lubes; none of the best are spray-on.
The easiest way to resolve the problem is by meticulously cleaning your rotors and brake callipers with isopropyl alcohol. This is the recommended cleaner for both SRAM and Shimano. If your pads are still fresh with lots of brake material left, sometimes you can sand away the contaminated layer from the pads. But this doesn’t always work. I would suggest having new pads ready before trying it.
Time For New Pads
Worn-out brake pads can make a lot of noise, especially if you’ve managed to wear them down to the metal backing plate.
It’s best to regularly check the condition of your brake pads by either looking inside your calliper or by removing the wheel. If you can’t see any material on the pad, it’s time for a replacement. When installing a fresh set, make sure to also check your rotor for wear and meticulously clean it as well as the calliper. This helps prevent any old contamination from transferring to the new pads.
 When replacing pads, it’s also worth considering the type of brake pad compound you’re using. There are three kinds of pad compounds, and all of them have distinct advantages and disadvantages.
Organic Pads
If noisy brakes are your number one concern, these are the pads for you. Sometimes also called resin pads, they have a powerful initial bite and don’t need to be warmed up to work well. The main downsides of organic pads are their increased wear rate when used in gritty or muddy conditions. Plus, they are more prone to brake fade on very long descents.
Metallic (or Sintered) Pads
These pads are typically more durable than organic pads, making them a must for mountain bikers, gravel riders, and cyclocross racers who often ride in harsh conditions. They are also more resistant to fade on long descents. Their main downside is that they tend to be much noisier than organic pads. Metallic pads also need more time to warm up before they perform at their best.
Semi-Metallic Pads
An in-between option, these tend to be the most expensive choice of pads. But the advantages include better stopping power on long descents—compared to organic pads—and quieter operation than metallic pads.
If your disc brakes routinely make noise—and your pads are not worn out—switching to a different brake pad compound (or even the same compound from another brand) is worth trying.
Bed in Your Brakes
A crucial step whenever you get a brand-new bike or install new pads is bedding in your disc brakes. The bedding process transfers a bit of the pad material to the rotor. This creates better engagement between the pad and the rotor. It can also help avoid noise-inducing vibrations.
Each pad and rotor manufacturer has its bed-in procedure. Generally, this entails performing a series of 10 to 15 controlled stops from a moderate speed. With each successive stop, you should feel the braking power increase. It’s crucial that you don’t lock up your brakes while doing this. This prevents the even transfer of material to the rotor, which can result in noise further down the line.
Check Your Bleed
This step is exclusive to hydraulic disc brake systems. If you have mechanical brakes, then skip this part.
Suppose the last person to bleed your brakes overfilled the system with hydraulic fluid. In that case, the pistons might not fully retract, resulting in a smaller gap between the pads and rotors. Sometimes, pistons can also wear or need to be lubricated. Both can potentially cause rubbing and noise.
 These issues can be tough to diagnose at home. If you’ve tried everything else on this list, it’s worth heading to your local shop for brake service.
If you’re bleeding your disc brakes yourself, follow the manufactures bleed procedure carefully (each brand posts these on its site or YouTube). Use the correct bleed kit and the brake system’s specified brake fluid (do not use DOT fluid in mineral oil systems or vice versa). Also, use the correct calliper spacers for the brand and brake model.
It Could Be Your Frame, Not Your Brakes
If you’ve tried everything on this list and nothing has helped thus far, it’s time to check your frame. When adjusting the calliper, pad, and rotor alignment, the frame mounts (to which the calliper attaches) must be adequately prepped to ensure everything sits nice and square.
 Usually, this is done at the factory by brands. Sometimes excess material on the mounts was not fully removed during finishing, or the brake mounts were not properly masked during painting. Other times it might be poor manufacturing tolerances.
The best solution for this issue is to take your bike to a shop with disc brake-facing tools. Most shops can handle this service, but it doesn’t hurt to call ahead and ask. This tool removes any excess material from the mount to ensure your callipers sit flush and square to the rotors.
READ MORE ON: brake maintenance brakes disc brakes DIY maintenance