How Pelvic Tilt Can Affect Your Performance
Bike fit is complicated - pelvic tilt is a key factor in performance, and once you are set up here are 5 exercises to maximise your strength.
“Pelvic tilt” is one of those terms you’ve probably heard before–perhaps in yoga class or during a coached strength workout. And while the concept is frequently discussed with on-the-ground exercises, it applies to cycling as well.
“We want, ideally, a neutral lumbar [low] spine when we’re riding and your pelvic tilt has a lot to do with this,” says Craig Secor, P.T., D.P.T., a Richmond, Virginia-based physical therapist and bike fit specialist.
Your pelvis is connected to your spine and your legs, “so whatever you do with your pelvis, it affects both the upper and the lower part of your body,” says Jenni Paras-Tan, P.T., D.P.T., founder of JenniCycle Physical Therapy. If you think of your pelvis as a bowl and it’s tilted too far forward (into an anterior pelvic tilt) or too far back (into a posterior pelvic tilt), it can trigger a chain reaction throughout the body that can seriously screw with your riding.
On the bike, ideal pelvic positioning is somewhere between an anterior and posterior pelvic tilt. This sweet spot is known as a “neutral pelvic tilt,” and it can make a big difference in your comfort and efficiency while riding. (In some cases, the best position for cycling may be a very slight forward tilt to recreate the natural curve in your lower back, says Secor.)
Keep in mind a neutral pelvic tilt won’t look exactly the same on everyone. “My neutral pelvic tilt might be different from your neutral pelvic tilt, because we have different bony anatomy and structures,” says Paras-Tan. But the general idea is to avoid pushing your pelvis too far into an anterior or a posterior tilt. Below, we explain more about what that means, plus how you can improve your pelvic positioning in the saddle.
What is an anterior pelvic tilt?
Anterior pelvic tilt is essentially when your pelvis is tipped forward. Imagine lying on your back and then arching your low spine so that someone could slide their hand under your low back—that would be an anterior pelvic tilt, says Secor.
Having an anterior pelvic tilt creates a concave spine, and, when you’re on a bike, pushes your stomach towards your thighs as you pedal, explains strength coach Mike Schultz, C.S.C.S., C.P.T., head coach and founder of Highland Training. When that occurs, your diaphragm can no longer fully extend, which can cause you to take shallow breaths, says Schultz.
An anterior pelvic tilt can also compress your spine and encourage you to sink into your shoulders while you ride, says Schultz. The latter can further contribute to shallow breathing and also cause you to cock your head back, which can pinch your vertebrae, leading to more discomfort, according to Schultz.
On top of that, an anterior pelvic tilt can put your hips in a compromised position, potentially leading to hip impingement, and also force you to place more weight on your hands, says Secor, which can lead to compression in your hands and wrists.
As for what causes an anterior pelvic tilt while cycling? Saddle positioning can be one culprit. A saddle that is angled downwards would rock you forward and cause more anterior pelvic tilt, explains Secor. Additionally, low handlebars and a long reach for the hands can create an anterior tilt, says Paras-Tan.
Another cause: a weak core, says Schultz. That’s because holding good positioning on the bike demands a certain level of core strength–including strength in your hips, low back, obliques, and abs. When riders don’t have that, they can slip out of a neutral spine position and into an anterior pelvic tilt.
What is a posterior pelvic tilt?
You can think of a posterior pelvic tilt as “tucking your butt under you like a scared dog,” says Secor. Another visual: Imagine lying on your back with a bowl of water on your belly button. To do a posterior pelvic tilt, you would tip the water towards your stomach by flattening your low back into the ground, says Secor.
In the context of cycling, a posterior pelvic tilt causes the spine to round and the hips to disengage, says Schultz. This then causes you to place more emphasis on your quads to pedal, he explains, which is “not an efficient way to ride.” That’s because you’re using less muscle to cycle, which will eventually “make you a weaker rider,” says Schultz.
Moreover, similar to an anterior pelvic tilt, a posterior pelvic tilt can cause compression in the spine, says Schultz, which can lead to pain and discomfort. On top of that, tilting your pelvis back can lead you to round your upper back while riding, which can then trigger issues in your upper back, low neck, and shoulders, says Secor.
In terms of what causes the pelvis to tilt back while cycling, well, one culprit is your bike fit. For example, if your handlebars are positioned up high and there’s a short reach, then your trunk will naturally go into an extended position and your pelvis will tuck under you, says Paras-Tan. Or, if the nose of the saddle is tilted up, then you may sit into more of a posterior pelvic tilt, which will round your low back and feel “highly uncomfortable for most people,” says Schultz.
Another cause of a posterior tilt is also a weak core, says Schultz. It’s the same idea as with an anterior tilt: Holding good positioning on the bike demands a certain level of core strength, so when riders don’t possess that, they can slip into bad habits–in this case, tilting the pelvis back, slouching forward, and rounding the spine. This often happens when riders get tired, says Schultz, adding that on the bike, posterior pelvic tilt is more common than anterior pelvic tilt.
Why does pelvic tilt matter with cycling?
When you’re riding, it pays to pay attention to your pelvic tilt. As mentioned, tons of not-great effects can happen if your pelvis is rocked too far in either direction, like spinal compression, hip impingement, and shallow breathing—to name a few.
On the flip side, having good pelvic position can put your muscles at a proper position to work effectively as you cycle, says Secor. In other words, an ideal pelvic tilt can improve your muscle efficiency.
Pelvic positioning also just makes cycling feel more comfortable. “There’s something to be said about when you’re more comfortable, you can ride longer,” says Schultz. “Getting your body into a more comfortable position will improve your endurance and therefore, performance.”
How do you maintain a more neutral pelvis?
Sometimes, making a small adjustment on your bike can help you maintain a more neutral pelvis. For example, if you feel like you’re rounding your back (that indicates a posterior pelvic tilt), try tipping your saddle nose down slightly, suggests Secor. Just make sure that you’re not sliding forward and increasing the pressure on your hands, as that could lead to hand and wrist discomfort, he caveats.
Another option is to try to consciously change your pelvic rotation while riding. If you feel like you’re rounding your spine, think about tightening your abs, pressing into your handlebars to neutralize your upper back, and then focus on having a flat back, says Schultz. “It doesn’t need to be perfect, but you’re just looking for that neutral position,” he says. Sometimes, pushing your hips back slightly on the seat can shift you into ideal positioning, he adds.
If you’re struggling to find a neutral back, here’s a trick from Secor that can help: While on a stationary bike, have someone place a yardstick on your spine, from the top of your tailbone to your head. Try to touch the back of your head on the stick without looking up. This can help you get into a more neutral spine position so you know what it feels like and you can mimic it when you’re out on the road, explains Secor.
Beyond these small tweaks, giving core exercises a permanent spot on your workout schedule can help strengthen your back, hips, and abdominal muscles and thus improve your ability to maintain good pelvic positioning while biking.
5 Exercises to Address a Pelvic Tilt
Schultz recommends doing core work two to three times a week. For a full workout, pick five to seven exercises and do each exercise for 15 to 20 reps (or 30 to 60 seconds for isometric movements), repeated for 2 to 3 total sets.
How to use this list: Below are five awesome core exercises you can try for a full workout. You’ll need one set of light to medium weight dumbbells for the plank renegade row, and one set of medium weight dumbbells, kettlebells, or a barbell for the squat. Go for the rep range Schultz mentioned—15 to 20 reps or 30- to 60-second holds and 2 to 3 total rounds.
1. Front Plank
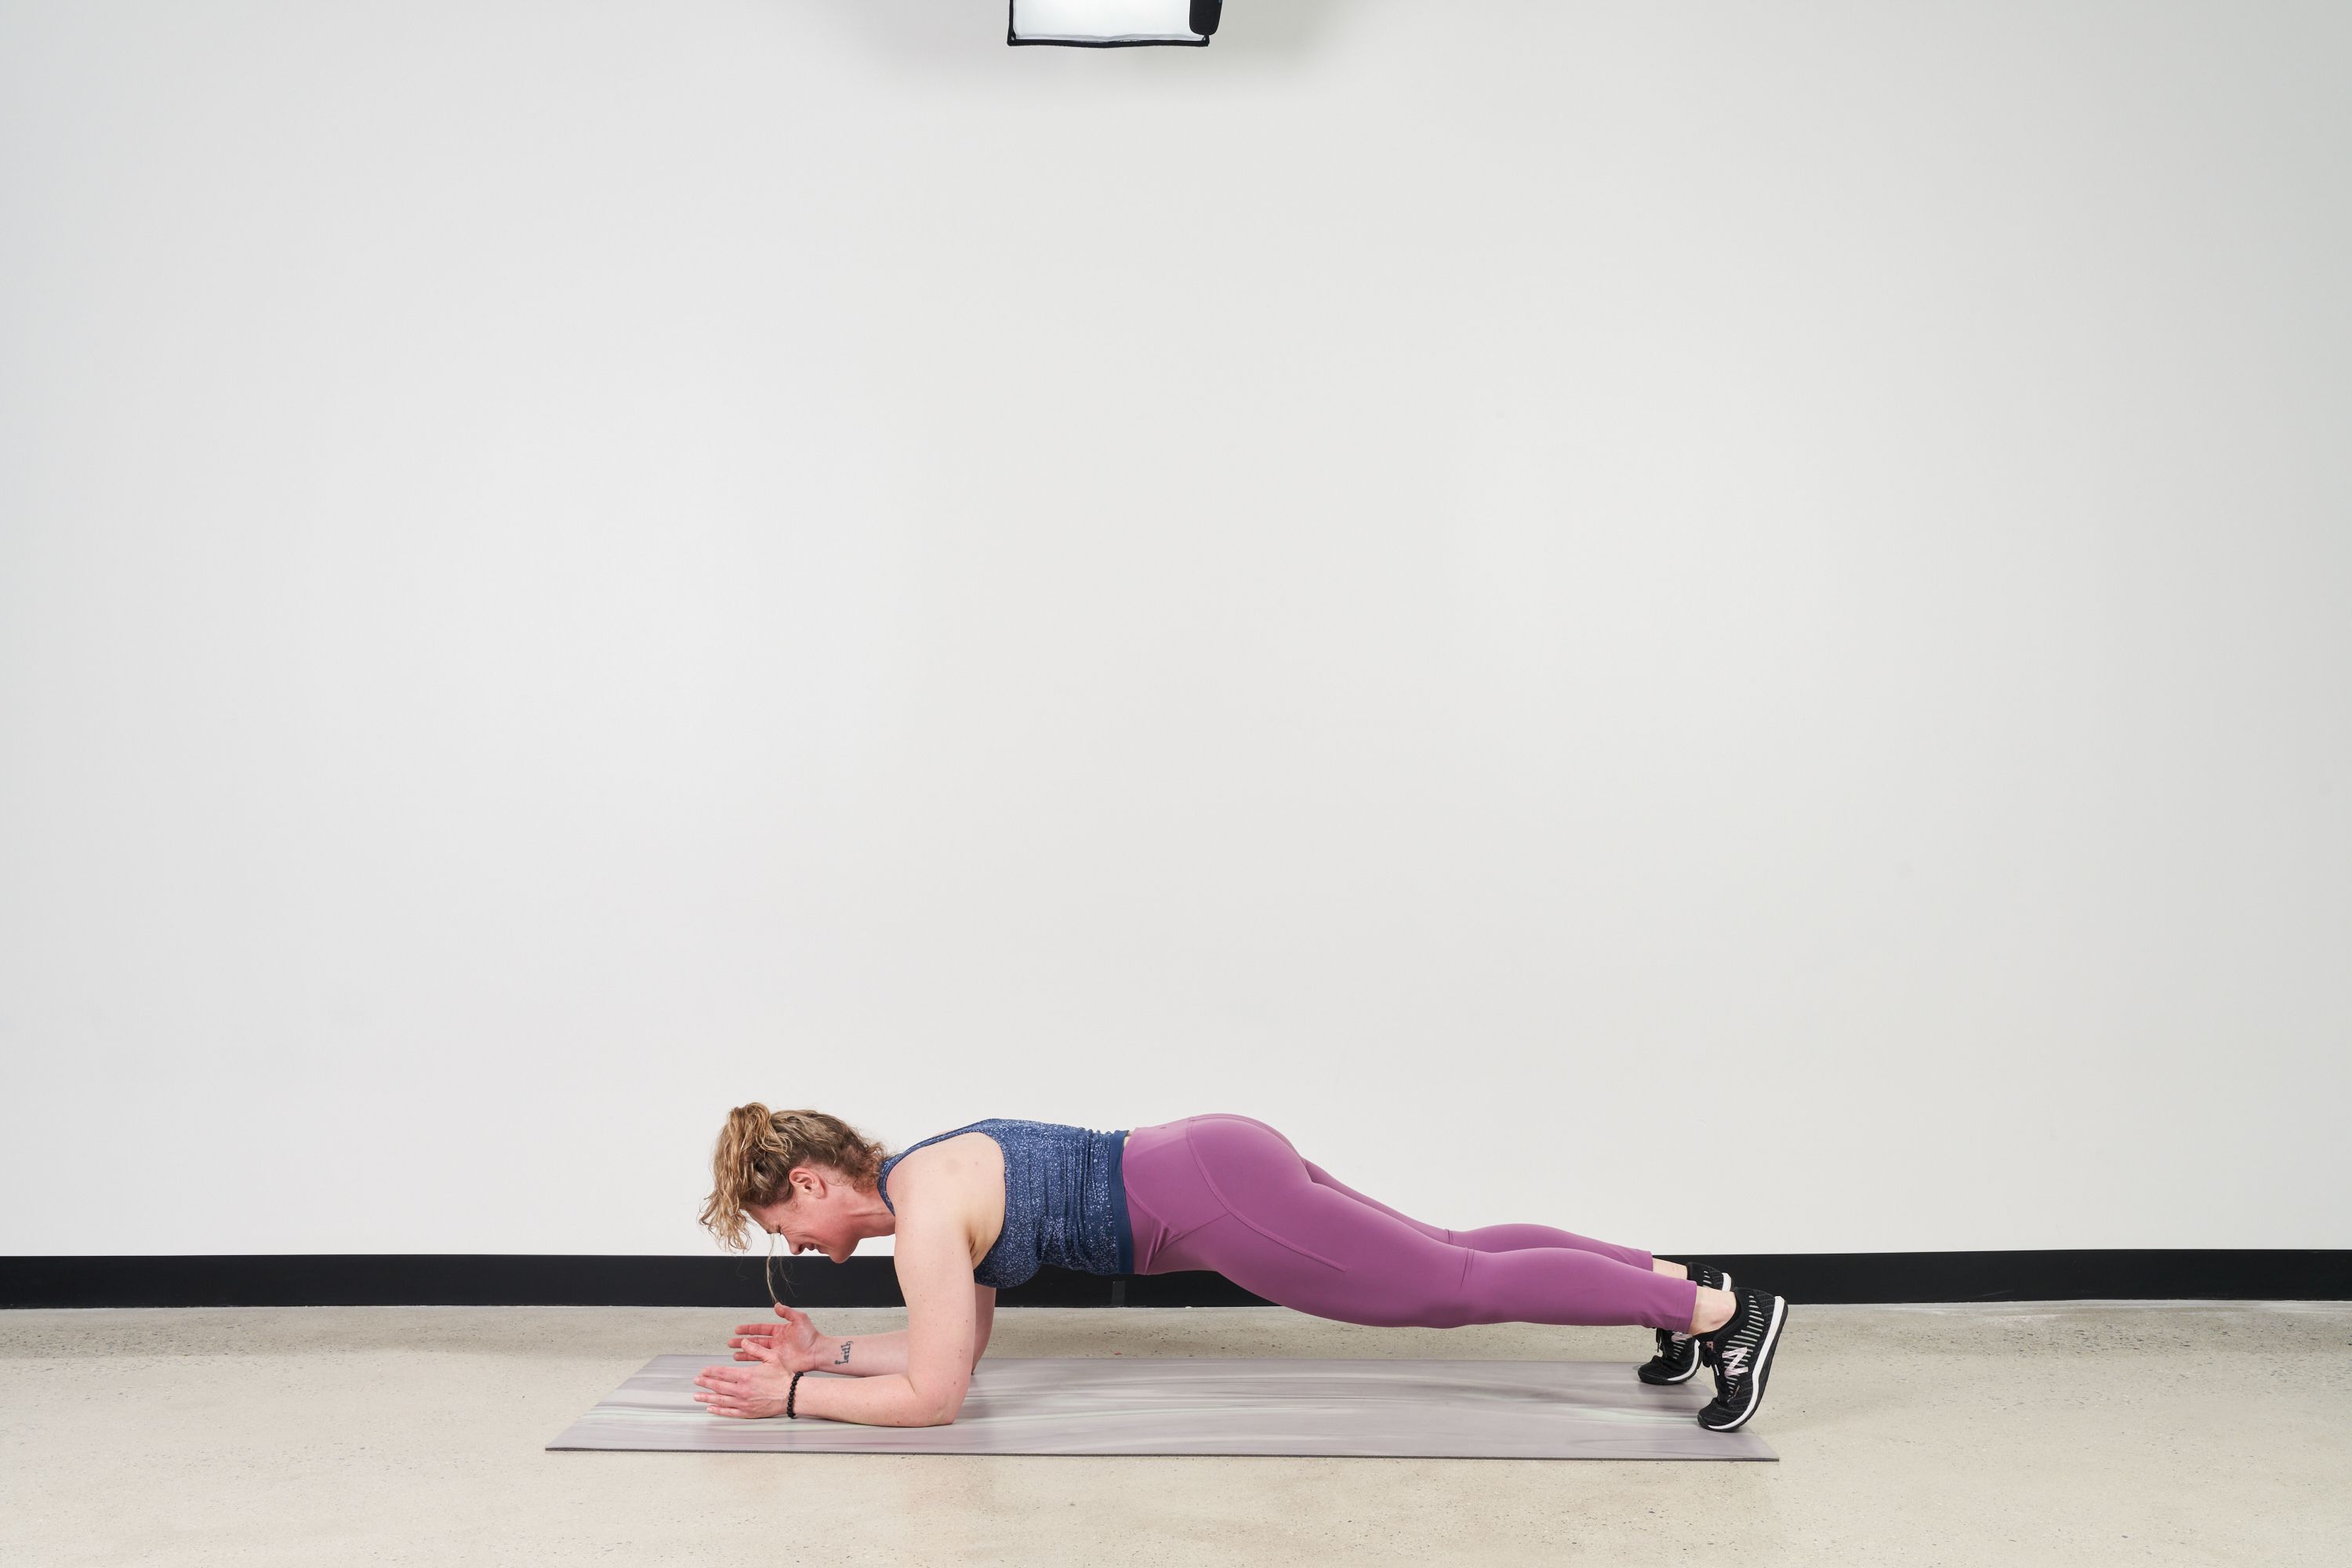 Start lying facedown, legs straight out. Place forearms on floor, elbows right under shoulders. Tuck toes, press forearms into floor, and lift entire body off the floor to form a plank. Engage abs and glutes, and pull shoulders away from ears. Body should form a straight line from head to heels to maintain a neutral spine. Hold.
2. Side Plank
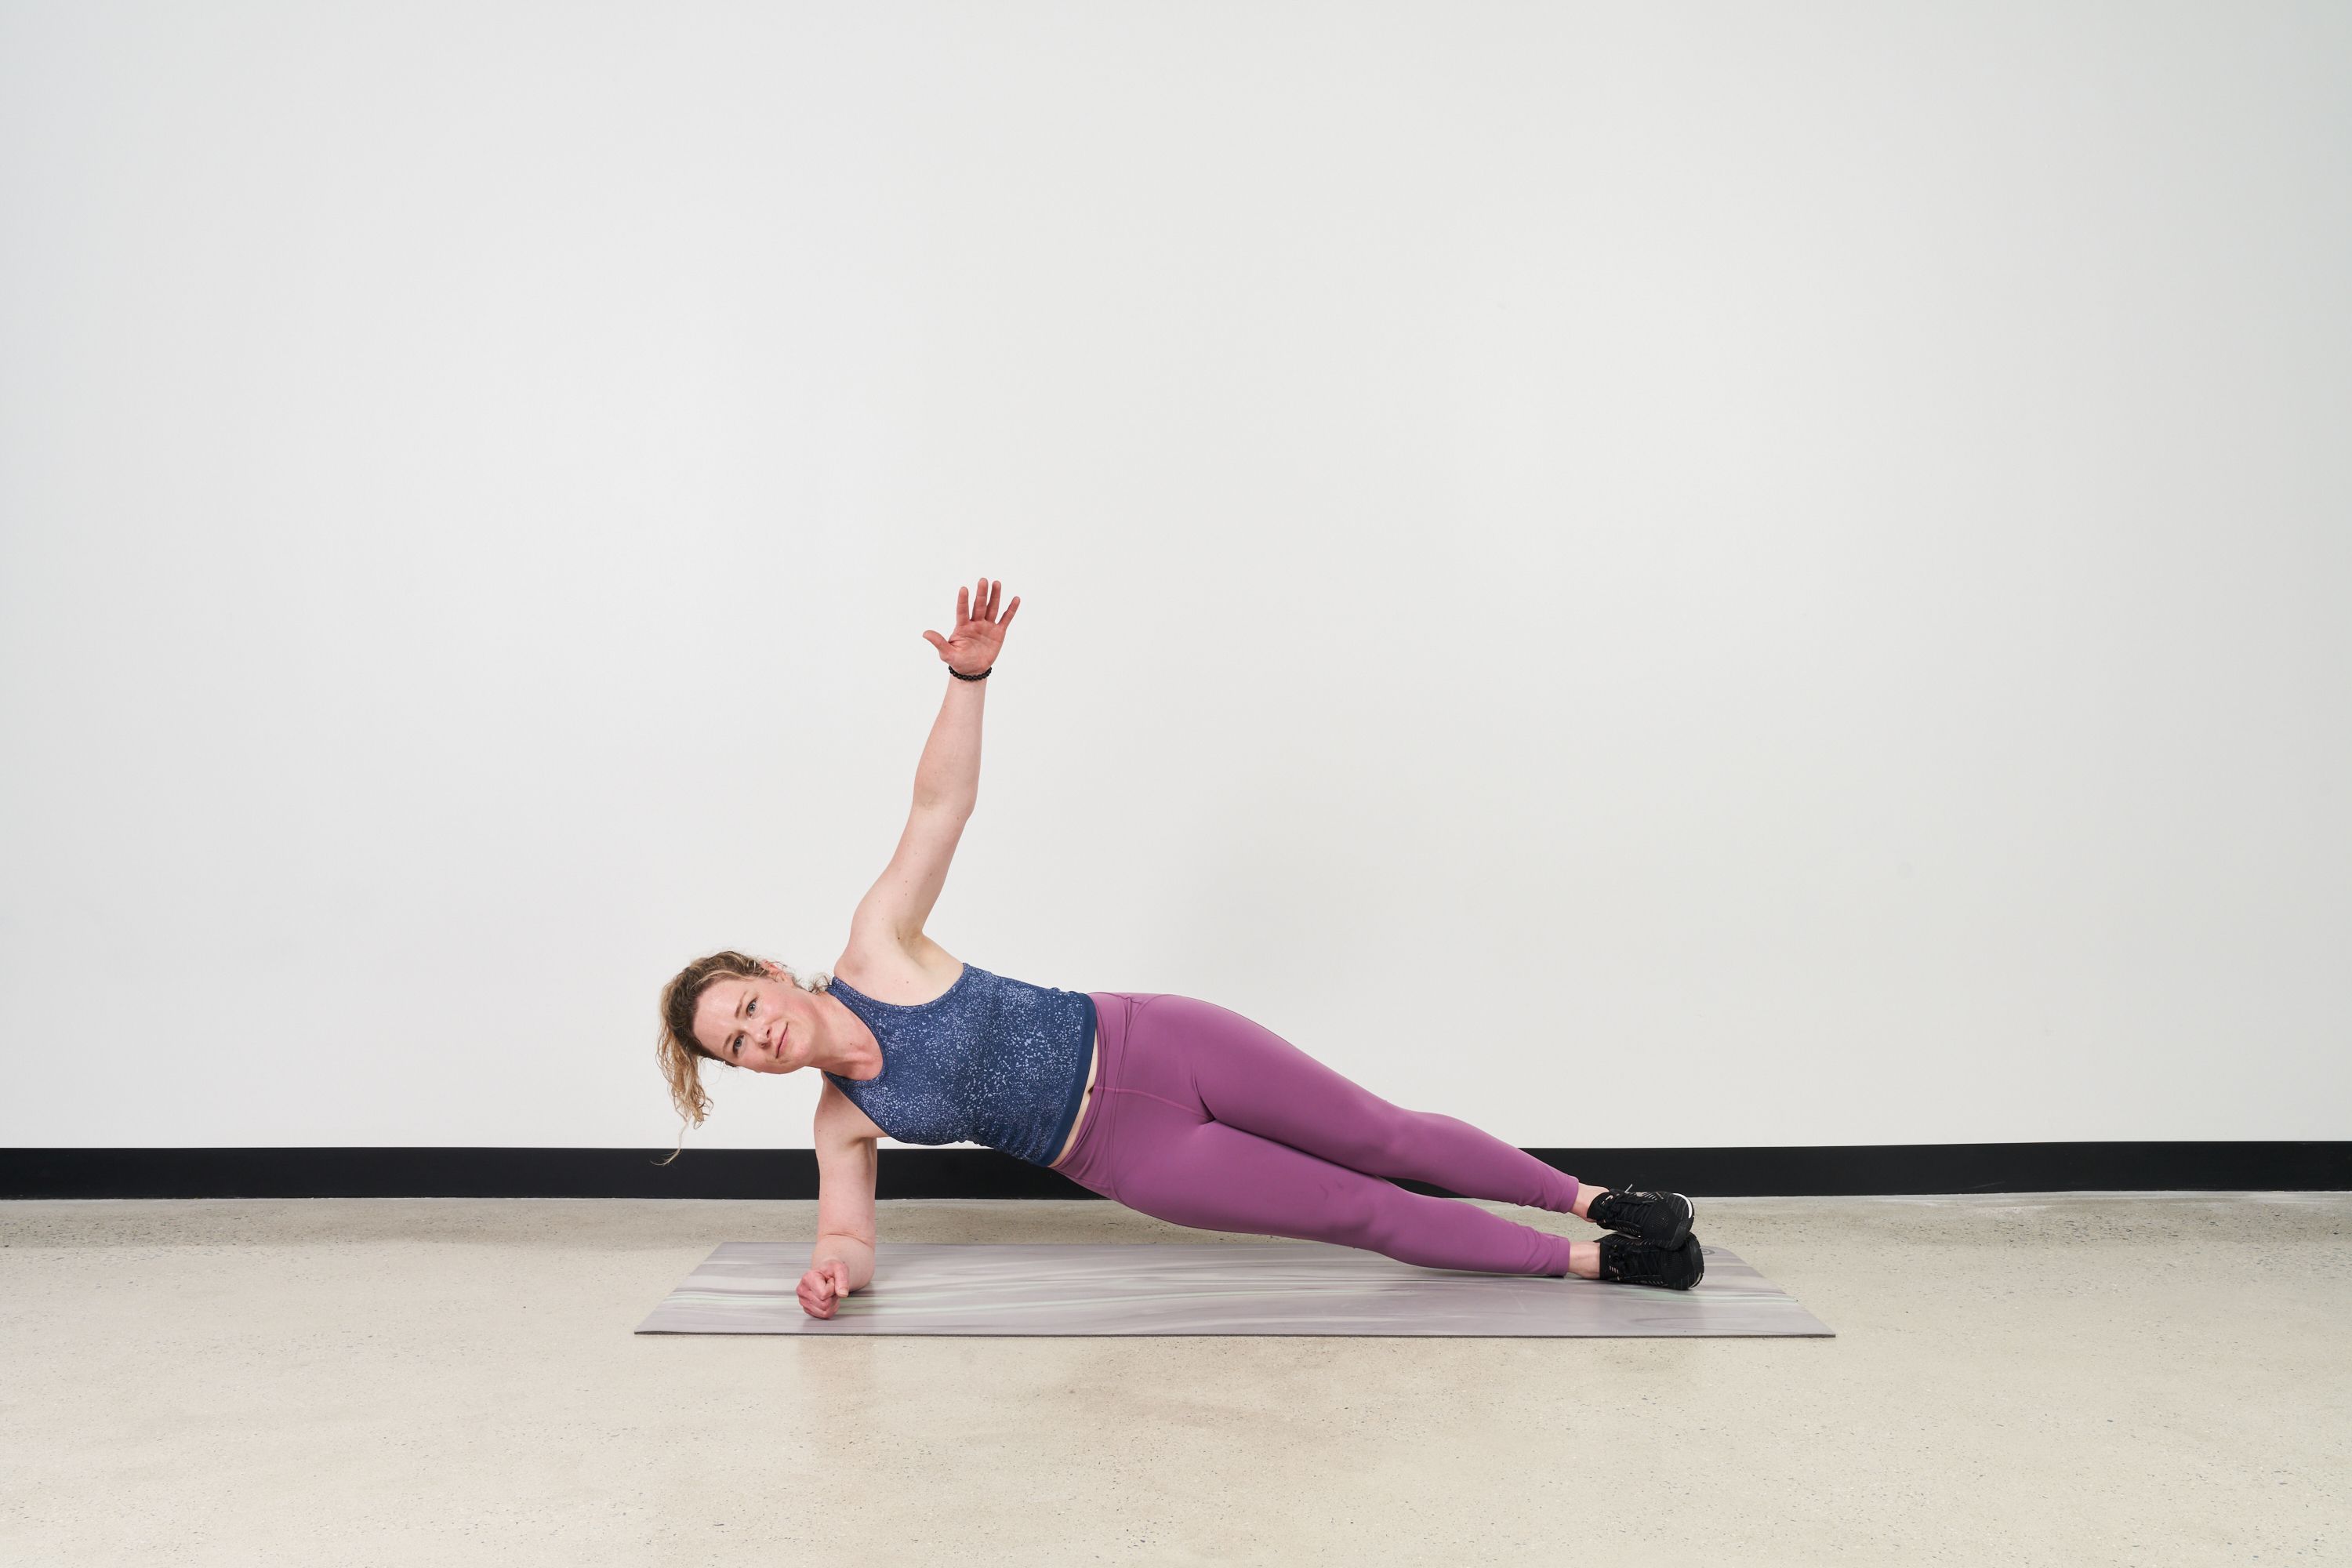 Lie on right side with right forearm pressed into the floor, elbow directly under shoulder. Stack shoulders, hips, knees, and ankles. Drive right forearm and foot into floor and use abs to lift hips off the floor. Squeeze glutes and engage core, lifting through obliques. If this feels too challenging, stagger feet or drop right knee to the ground. Hold. Then switch sides.
3. Reverse Plank
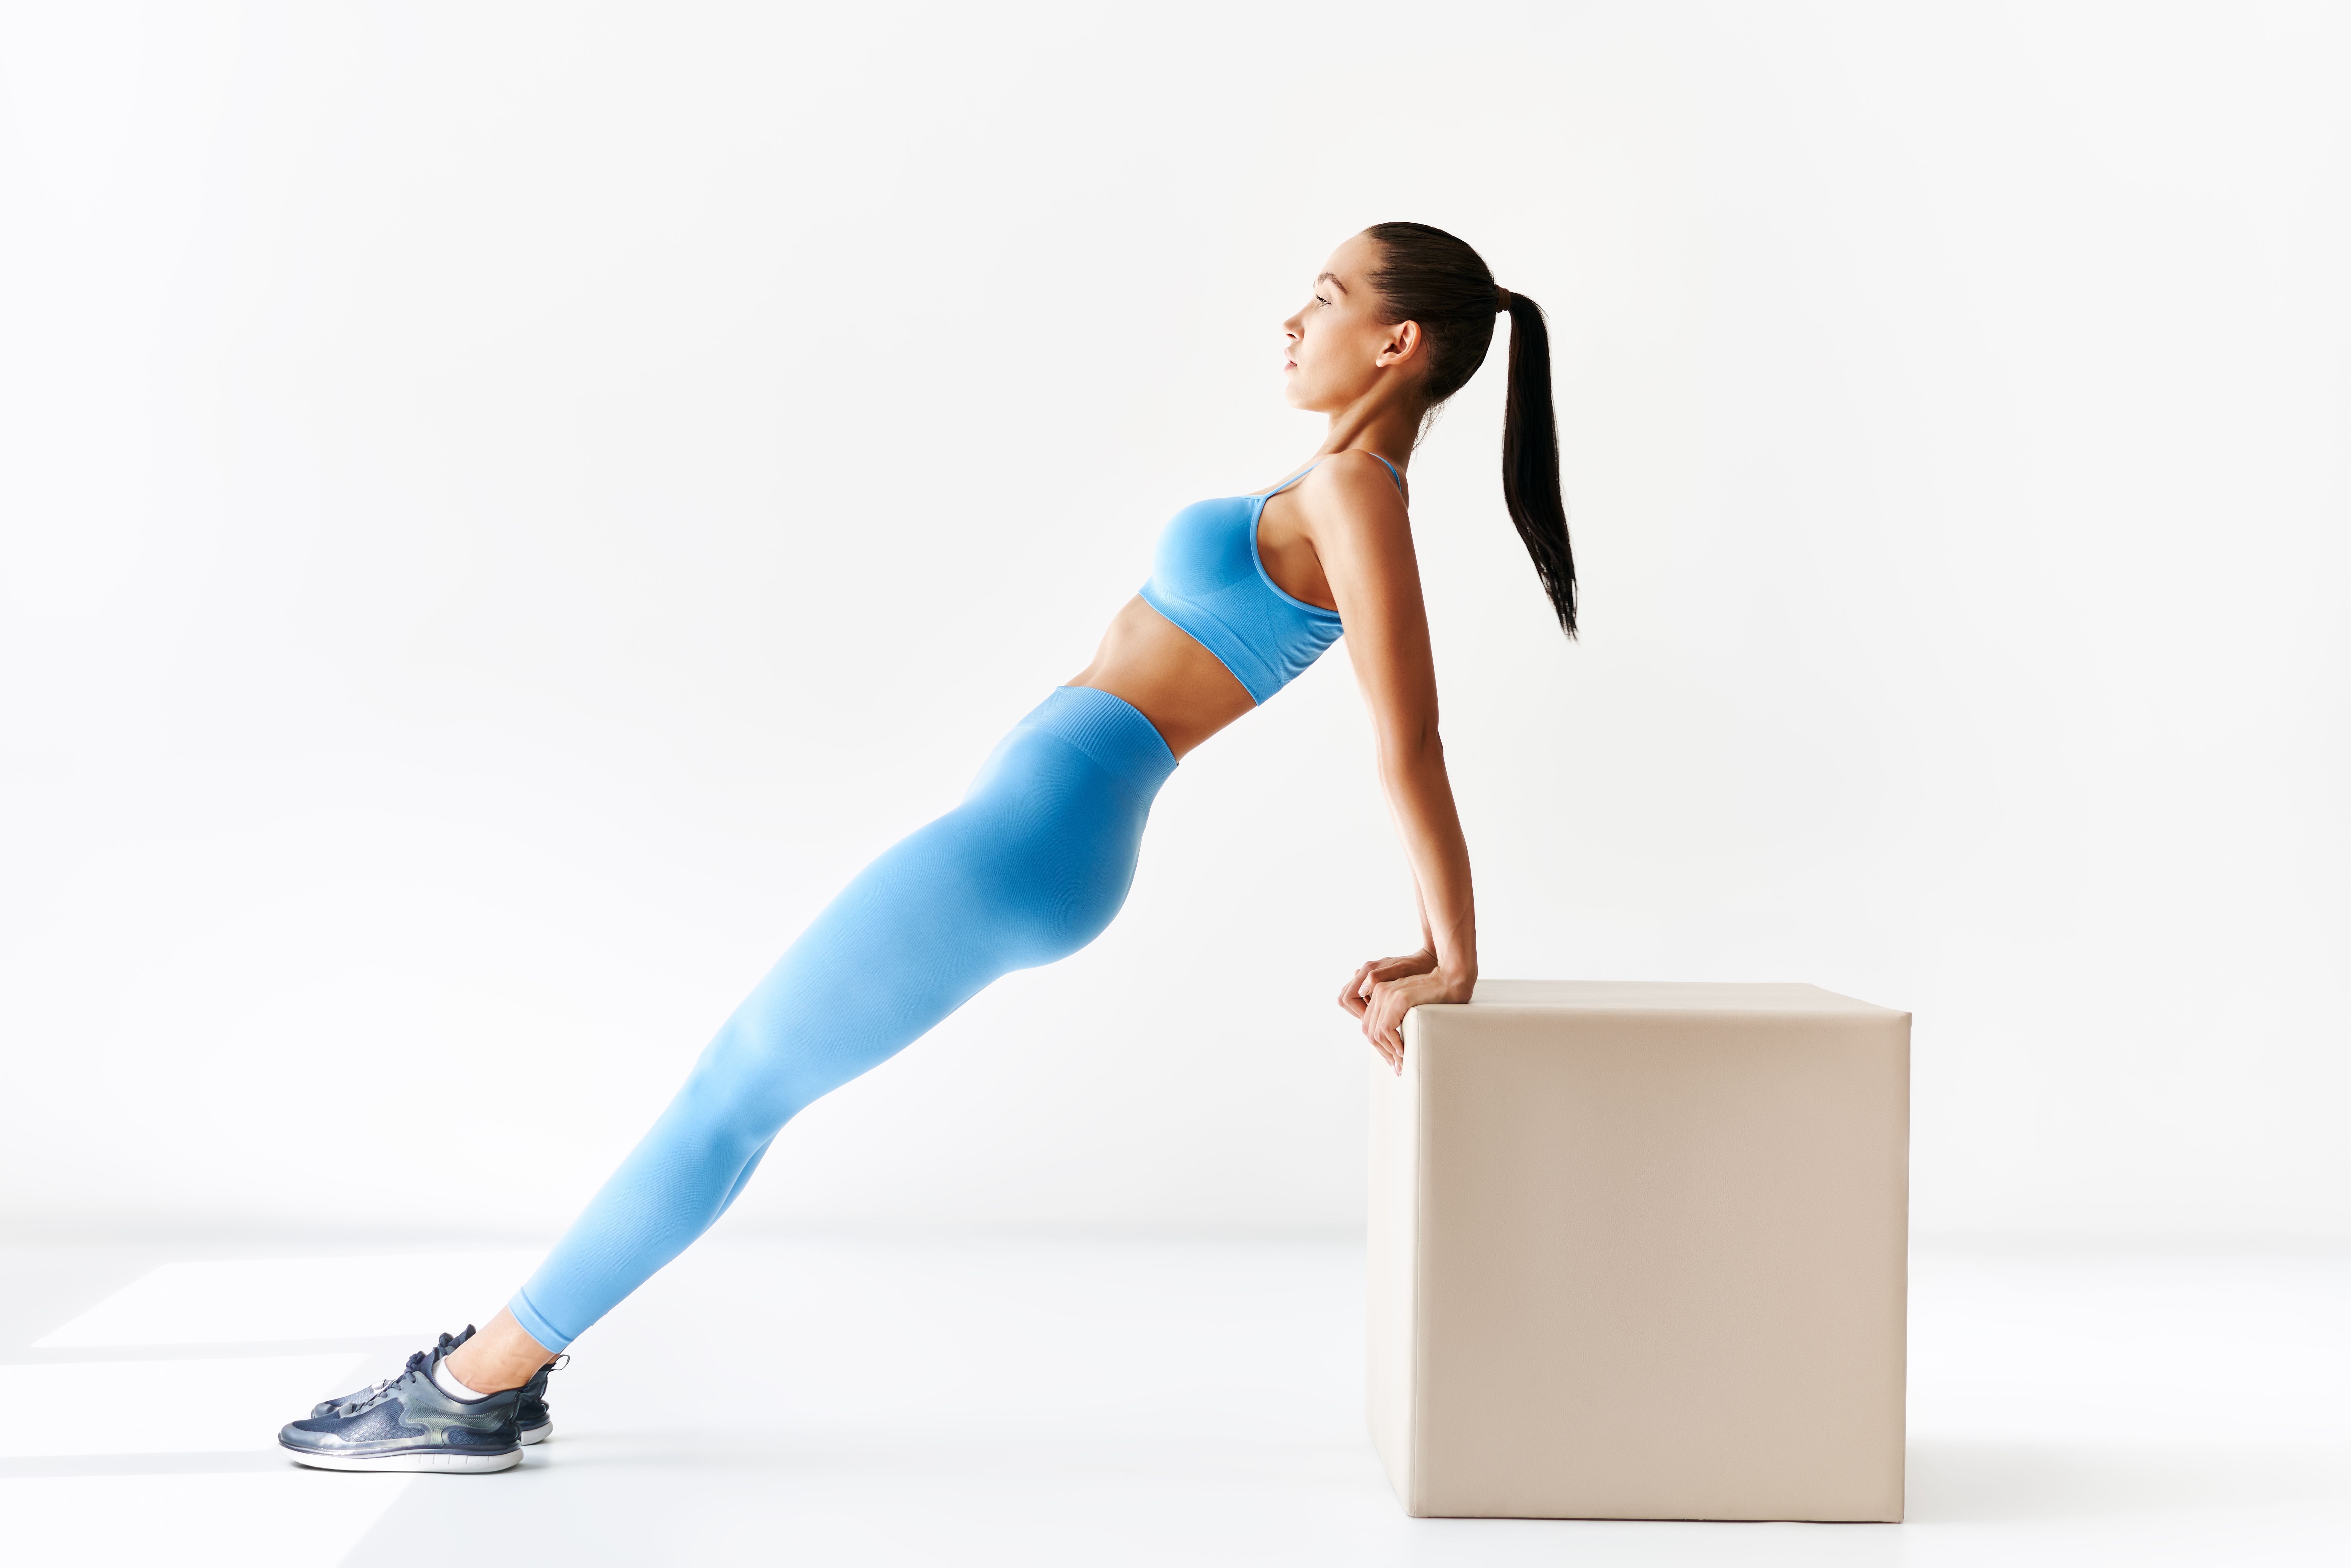 Start seated, legs straight, feet flexed, and palms flat on the ground on each side of hips. Press through palms and engage glutes to lift hips. Engage core to maintain a straight line from neck to ankles. Hold.
4. Plank Renegade Row
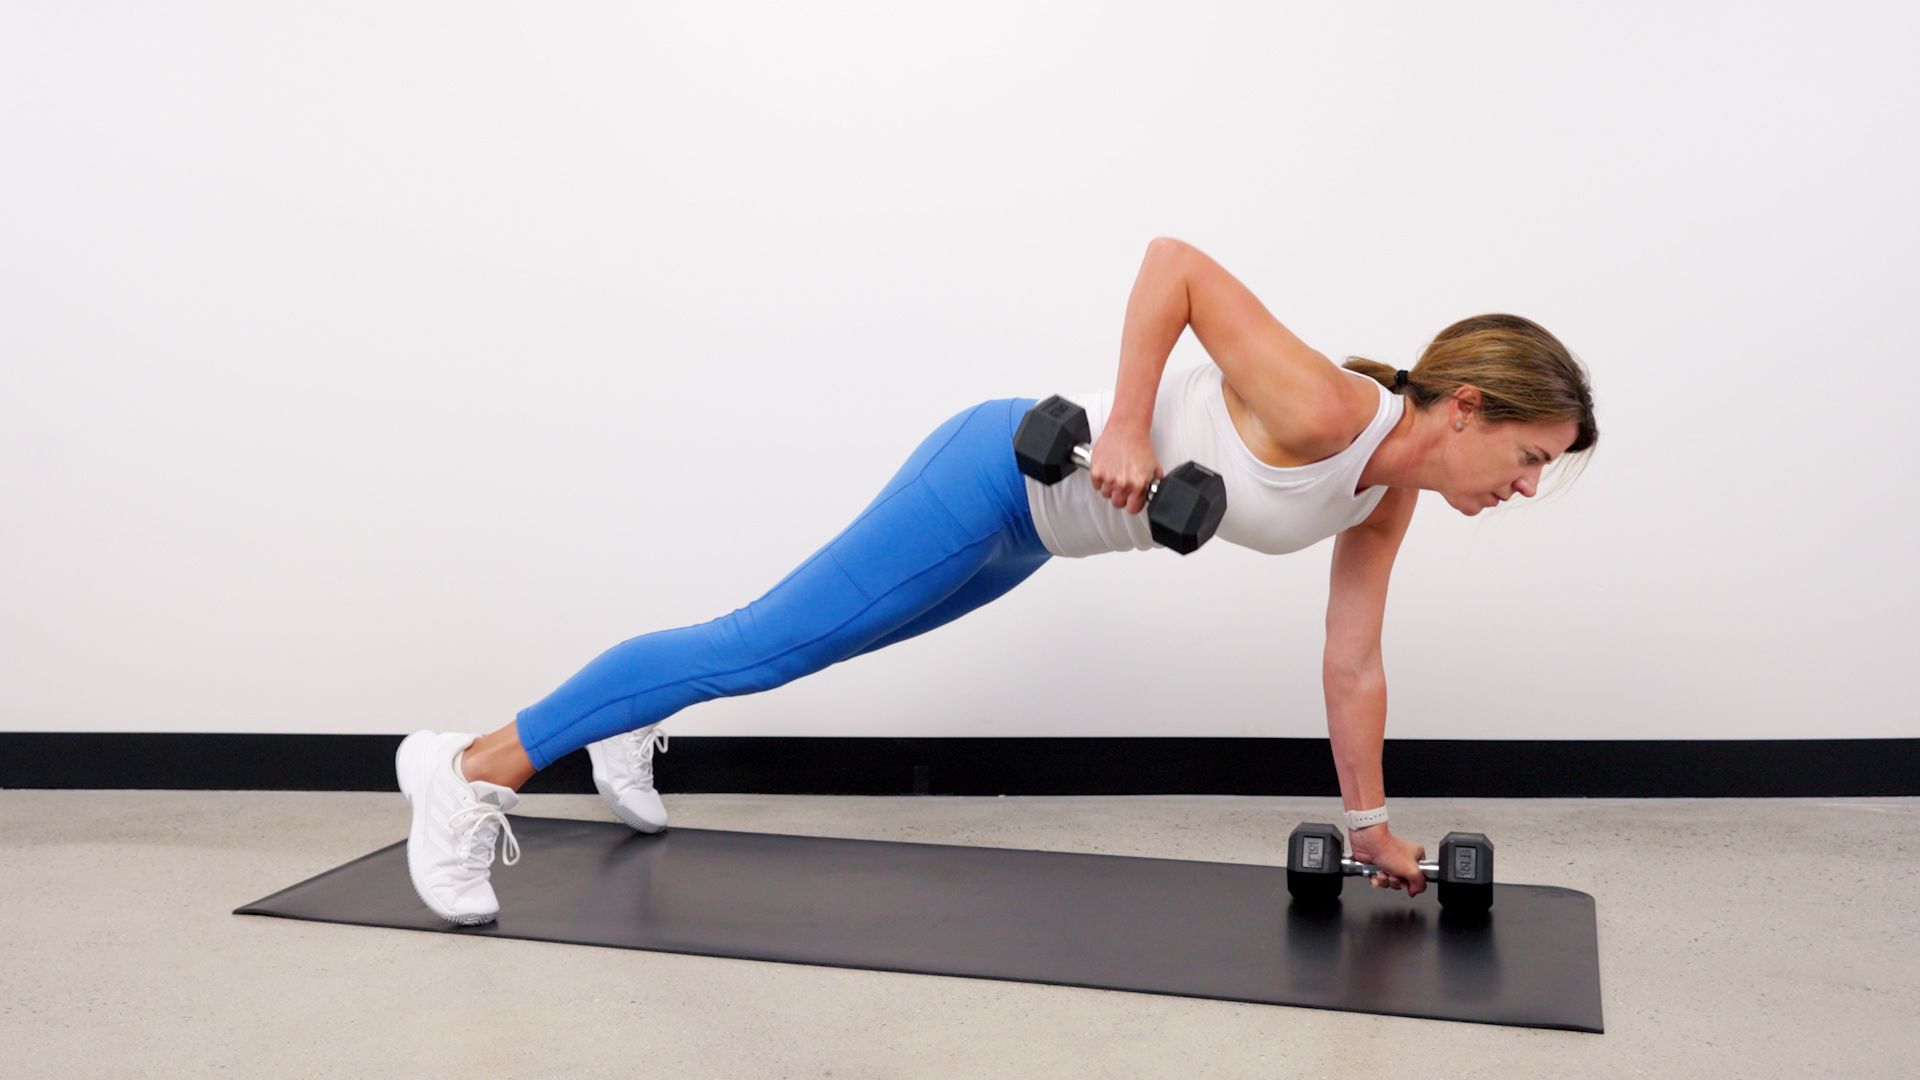 Start in a high plank position with feet hip-width apart, shoulders directly over wrists, and each hand on the dumbbell, placed on the floor. Body should form a straight line from head to heels. Pull shoulders down and back away from ears. Engage glutes, legs, core, and shoulders to create total-body tension. This is the starting position. Without moving hips, slowly pull right elbow up and back, keeping elbow close to side. Pause when weight reaches ribcage. Slowly lower the weight back down to return to starting position. Repeat on left side. That’s 1 rep. Continue alternating, keeping hips as steady as possible.
5. Squat
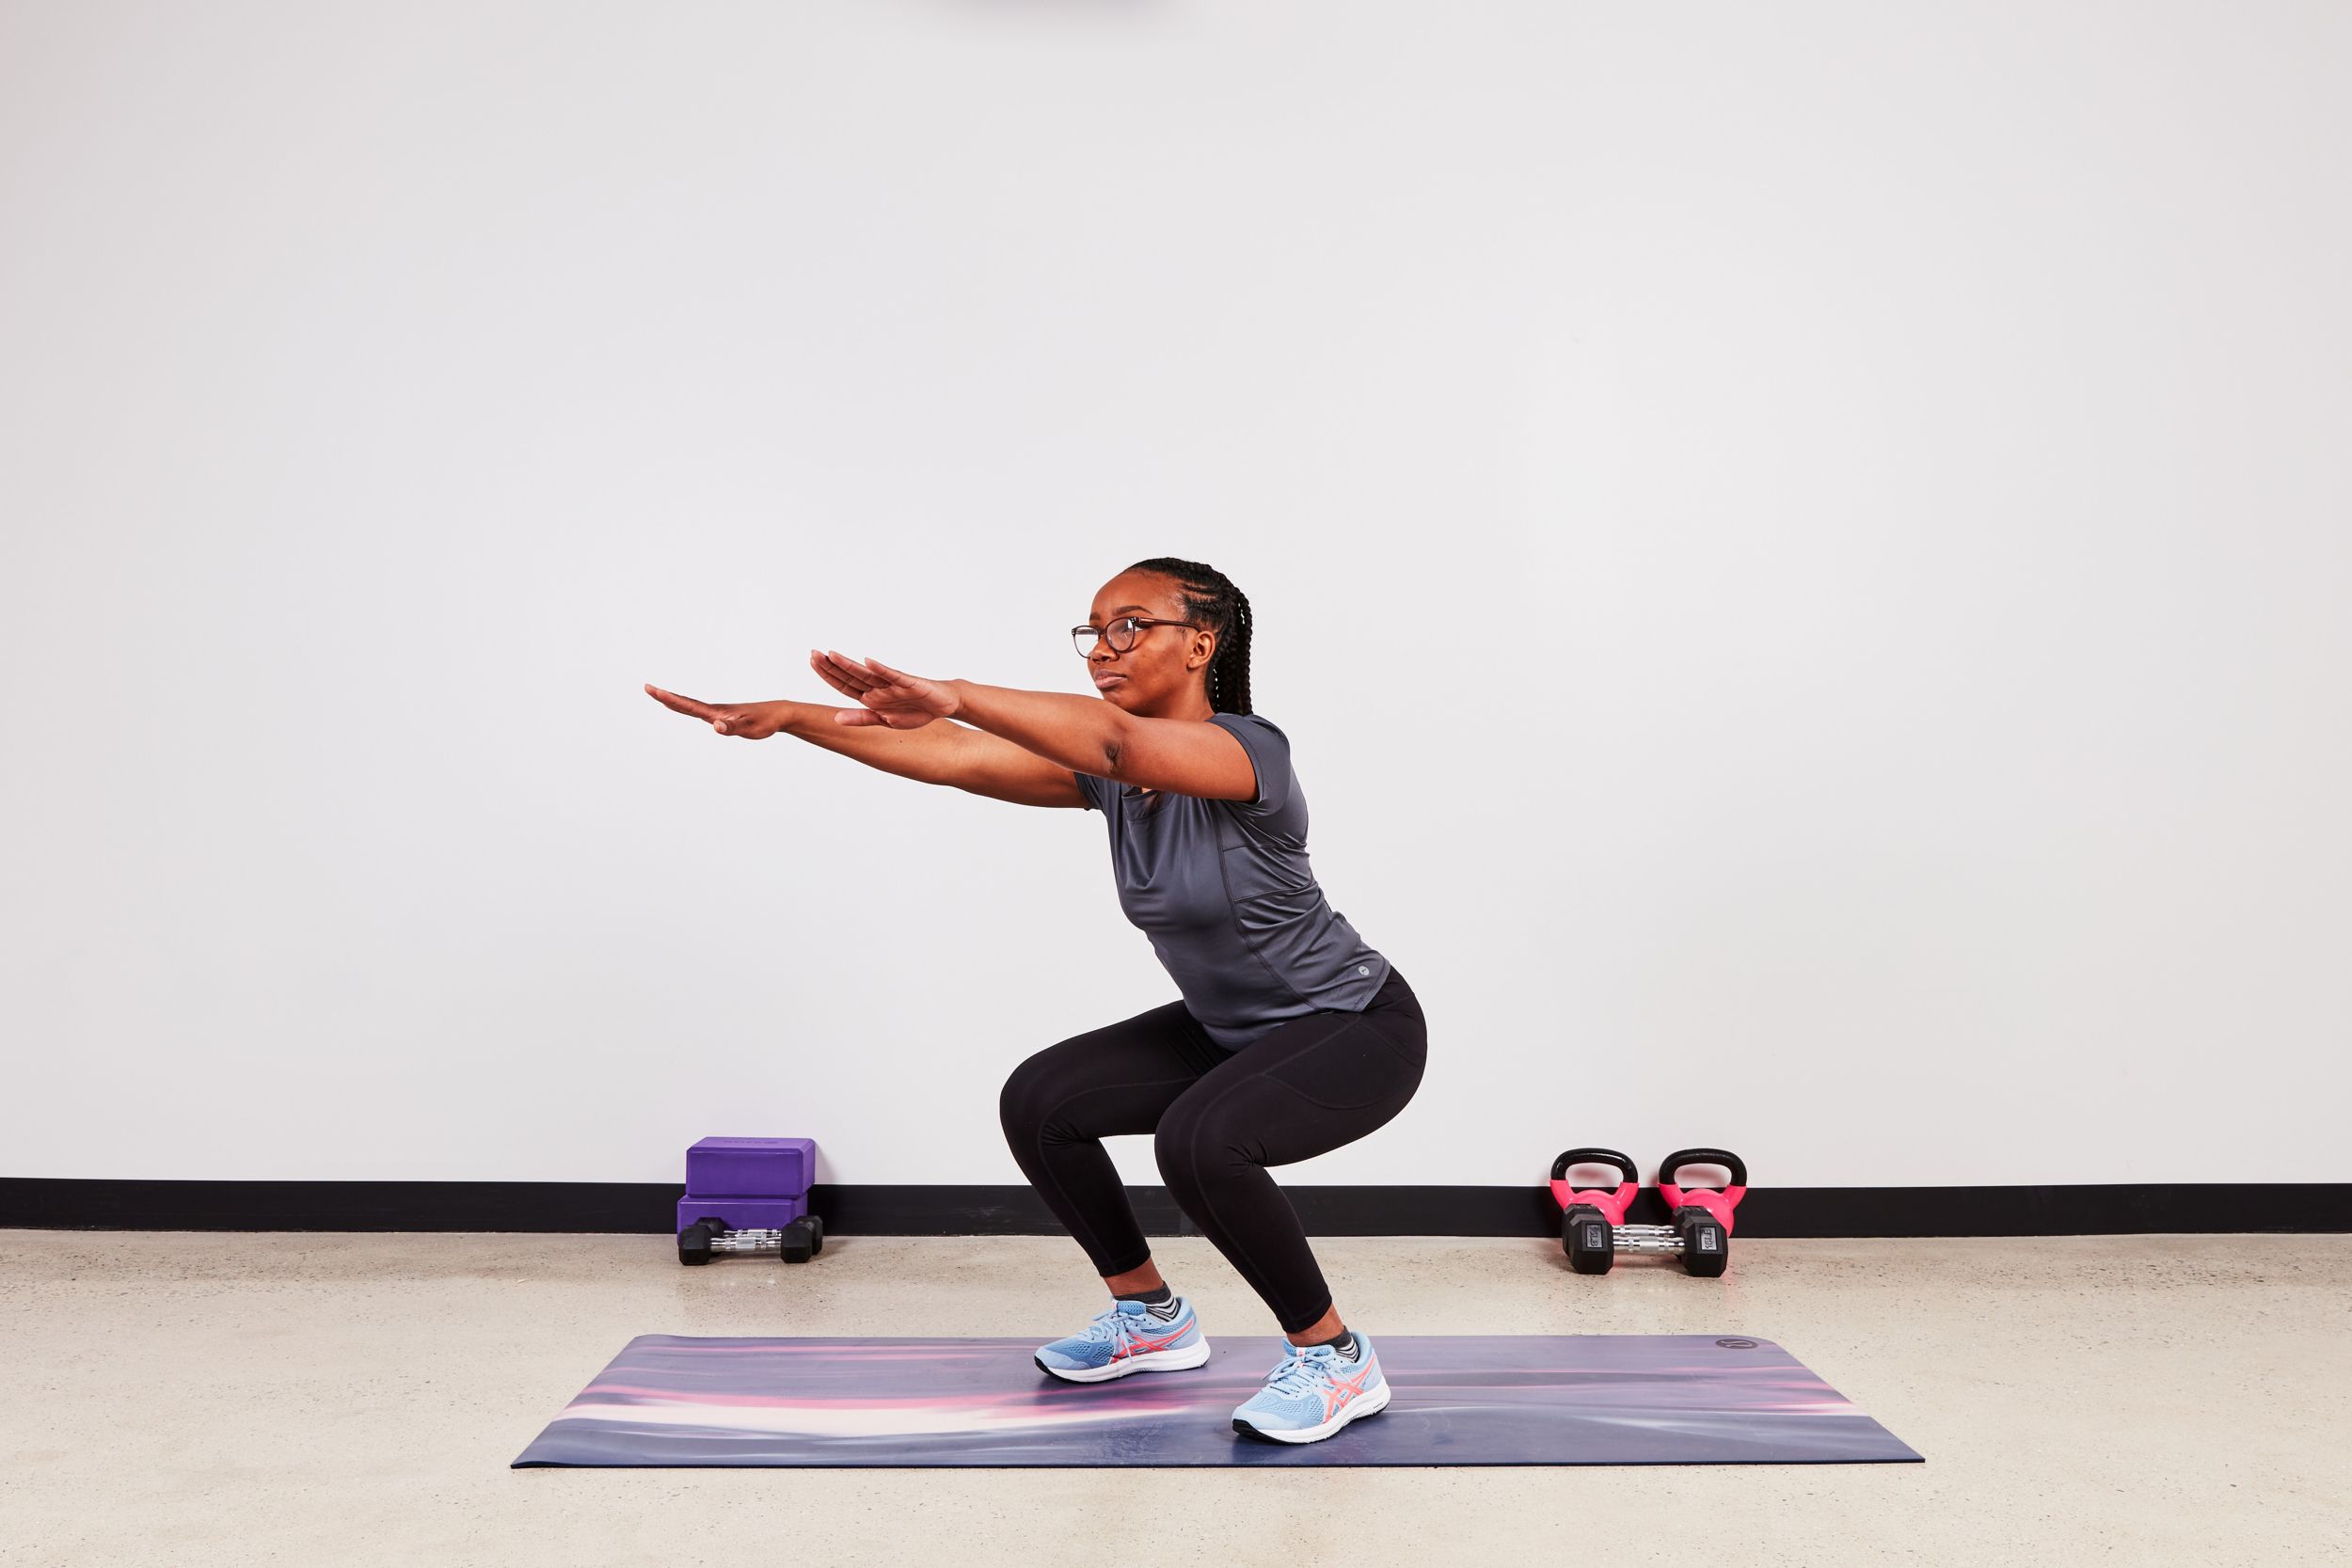 Stand with feet shoulder-width apart, toes pointing slightly out, a dumbbell in each hand, racked at shoulders with elbows bent. (You can also hold one kettlebell at chest or a barbell in front of shoulders.) Send hips down and back to lower into a squat. Keep chest lifted, core engaged. Pause at the bottom, then drive feet into the floor to stand back up. Repeat.
READ MORE ON: core exercises pelvic pelvic tilt

