
9 Tips for Improving Your Mountain Biking Technique
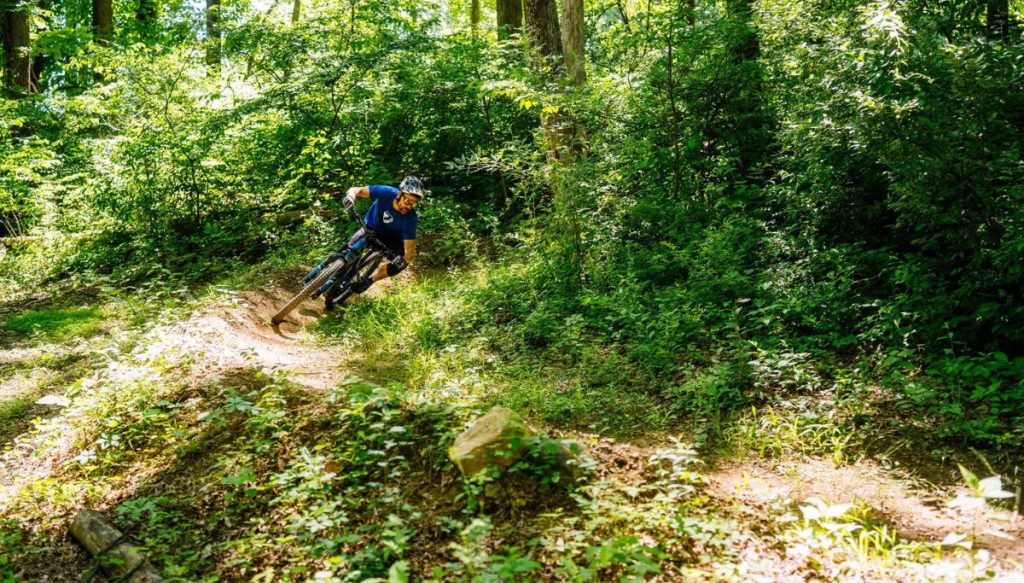
Chances are, you powered up a steep hill or careened fearlessly down a mountain, and thought, “Awesome! I want to do that again!” Then, you asked: “Where else can I go on my bike?” and “How can I squeeze more two-wheel, off-road adventures into my days?” That line of thought likely ended with the most important question, “If I’m going to climb and descend steeper and rougher, what skills should I improve to have more fun and be safe?”
“If I’m going to climb and descend steeper and rougher, what skills should I improve to have more fun and be safe?”
The answers, of course, depend on how much time you want to spend on your bike and your willingness to travel with all the gear you need, plus your bike. Whether you want to tackle longer rides, improve your technique, or race — or all three — there are some skills (we have nine of them here) you need to master for the ultimate mountain biking combination of excitement and harm reduction.
1. Lean into climbs
On flats, your weight should be evenly distributed between the hands, feet, and saddle. Keep a slight bend in the elbows to help absorb bumps.
As you climb, lean slightly forward, especially as an ascent gets more difficult, endurance mountain bike coach Scott Tietzel explains, and sit a bit farther on the nose of the saddle to help keep your weight ahead of the rear wheel.
Also, as the slope gets steeper, bend the elbows more and get your chest closer to the handlebar to help counteract the angle of the ground. Leaning forward also helps keep the front wheel on the ground.
Remember, though, that if you lean too far forward, the rear tyre will lose traction, coach Joe Howdyshell, founder of the Summit Endurance Academy says. This is one reason practice is so important. There’s no magic angle, so you’ll need to experiment with what works best on each trail.
Don’t forget to try getting out of the saddle, too.
“For climbs, and especially if you do a longer climb, there might be times when you want to stand while you pedal, because it will engage the muscles in legs differently and you can change your cadence, which counteracts the fatigue and strain that is put on the legs over an extended period of time. It can make the climb a little bit easier,” says Tietzel.
If you want to conserve energy for the downhill, don’t be afraid to walk your bike on steep climbs and technical uphills in order to keep your heart rate and exertion lower, adds Howdyshell. All of this is totally okay.
2. Drop to a low gear
A general benchmark for cadence on a ride is around 80 rpm, but on a steep climb you might dip as low as 60 rpm, says Tietzel. “You always want to use the gears you have available on your bike to try and keep your legs spinning and keep the load as light as possible so you’re not getting bogged down,” Tietzel says.
If your trails are loaded with steeper, longer climbs, consider changing the stock chainrings on your bike. “A chainring is a simple, cost-effective way to change the way your bike climbs. It’s a quick, easy swap to go from say a 34-tooth chainring to a 32-tooth,” Tietzel says.
When the number of teeth increases on a chainring, the gear ratio will also increase, which can be physically harder to pedal due to resistance. (“Gear ratio” is the number of teeth on the chainring divided by the number of teeth on the cog.) In contrast, a chainring with fewer teeth will provide a lower gear ratio, which increases torque and is easier to pedal, which is helpful on climbs.
While beginner riders may use flat sections on the trail as rest, especially if their heart rate is super high, as your fitness improves, you can add resistance back in more quickly. “As you become an intermediate and advanced rider and get more fit, you’ll be able to click up the gear every time the trail flattens out or the grade lessens,” which will help you move faster, Howdyshell explains.
3. Sharpen your technical skills
Your technical skills influence not only speed, but also energy expenditure — harder rides feel easier when you’re a better cyclist.
“You can gain speed and efficiency from mastering technique.” — Scott Tietzel
A seasoned rider who has practiced pedalling up steep boulders, through chunky rock gardens, downshifting for sudden uphill transitions, steering through sharp turns, or descending quickly and safely is going to be faster without really using extra energy, says Tietzel.
Howdyshell suggests only doing a high-volume ride every other week — be it three, four, or five hours — especially if you ride an hour every day. Otherwise, “you’ll blow up most of your weekday rides,” and make recovery more difficult.
5. Fuel up and hydrate
You won’t do yourself any good if you don’t have the energy to expend during a ride, and that means you need to eat a hearty breakfast about one to two hours before you start, says Tietzel.
While you’re out there, eat and drink the entire time. Aim to consume 300 to 400 calories per hour, depending on your body size and the intensity of the ride, says Tietzel.
Howdyshell notes that it’s important to take in calories (carbs in particular) on the climb, with water. A moderately hard ride with breaks might require 60 grams of carbs an hour, while someone racing at a higher intensity should aim for closer to 100 grams of carbs an hour, says Howdyshell.
One way to get calories is through a concentrated drink mix in addition to solid food, which should be washed down with water. For fluids, aim to drink 500–700 ml per hour.
“As long as you ride where there’s water, having a water filter is great. My partners and I ride with water filters, because that goes back to not carrying so much weight with you. Water is very heavy to have on your bike or in your pack,” says Tietzel.
6. Fine-tune your workouts
A cyclist’s power output will ebb and flow more on a mountain bike than road or gravel, explains Tietzel, with “more short, hard pedal strokes mixed with coasting.”
To help improve endurance and fitness, train to mimic the power output you do on the trail. For example, do workouts on a road bike or indoor trainer that include 30-second power bursts or other interval sessions, says Tietzel.
Long rides improve aerobic efficiency and overall endurance, while “intervals will increase your anaerobic threshold and help you bike at a higher intensity level during an event or ride,” says Tietzel.
“For someone training to race, 20 percent of their total volume of training would be dedicated to higher intensity at their threshold, which is a level you can maintain for 30 to 60 minutes. Do two to three slightly longer intervals [at this effort] that are eight to 20 minutes each,” says Tietzel.
If you do five rides per week, Howdyshell recommends one hard ride workout per week.
Tietzel warns that burnout can follow too much high-intensity training. Usually one to two workouts per week, balanced with rest and recovery, does the trick.
7. Tailor terrain choice to your races
Racers and goal-oriented mountain bikers: If there’s a specific ride or race you’re targeting, study the terrain profile and do training rides to prep for the landscape.
“If you’re looking to target a specific ride or race that has more climbing than what you’re used to, do climbing as part of your regular ride routine,” says Tietzel.
If you live in a flatter area, you can practice climbing indoors using resistance on an indoor trainer like Zwift. Or, ride against a headwind outside.
“No matter how perfectly you fuel and execute your ride, if you train three hours a week, a five-hour ride will suck — doesn’t matter how expensive your bike is or how many massages you got,” Howdyshell says. “If you want it to feel good, you have to train.”
8. Know your effort level
Using tools to measure your output level can help you understand the effort and duration you can sustain on a mountain bike. A power meter is the most reliable tool for mountain bikers to measure energy output, followed by heart rate, says Tietzel.
To make the most of a power meter, you should also run a Functional Threshold Power (FTP) test to know the average number of watts per hour that you can sustain on a ride. The test helps hone your threshold and personalised training zones based on power.
Training zones correlate with the average power output and heart rate (HR) zones, according to TrainingPeaks. “Zone 2 [which is 56 to 75 percent of FTP] would be where your endurance training would happen—that might be at 160 to 180 watts. Someone who is training for an endurance event will spend up to 80 percent of their total training volume in that zone 2,” says Tietzel. Howdyshell agrees.
Using power zones for training can help ensure variety in your workouts, which leads to greater fitness.
“The two biggest mistakes athletes make are riding too hard on their easy rides, and not riding hard enough on hard rides. If you go too low power in the VO2 max zone and too high in the endurance zone, you are closing the gap rather than doing polarized workouts. You won’t gain as much,” explains Tietzel. Fatigue will also accumulate if you ride too hard on easy days.
“A racer keeps the same effort level and power output the whole way,” explains Howdyshell. “They will gear down when it gets steep and gear up when it flattens, adjusting to the grade.” This is a good goal to work toward.
Additionally, using heart rate data is the “best bang for your buck. You can spend a couple hundred bucks on a really good heart rate monitor, do a lactate threshold test, and figure out your heart rate zones,” adds Howdyshell.
9. Be aware of altitude
Pedalling at 580 metres above sea level differs from riding at 3,810 metres. If you’re travelling to a higher altitude to bike, your body will need time to adjust upon arrival, says Tietzel.
Tietzel’s advice for those traveling to higher locations: expect your performance metrics to go down. “You’re looking at a drop in power for every 300 metres you go up, and it could be more, especially if you’re not acclimated to the altitude,” he says. In other words, a rider’s FTP is lower at altitude than it is at sea level.
Every person’s body adjusts differently to altitude based on genetics, how long they’ve lived at their home altitude, the altitude difference where they plan to race, and other health factors, such as cardiac history. Still, in general, your power numbers might be lower and your breathing more labored the higher you go. Slow down when you need to so you can keep riding.
This article first appeared on bicycling.com
READ MORE ON: mountain biking mtb skills